Having a static IP address for your FileMaker server is important because without it, your router may re-assign the IP address of your aACE server. This would render the aACE launcher and anything else pointing to your aACE server obsolete.
Note: If you had an aACE launcher configured, then the IP address changed, a new launcher must be configured.
- From the Apple menu, click System Preferences.
- In the third row from the top, click Network.
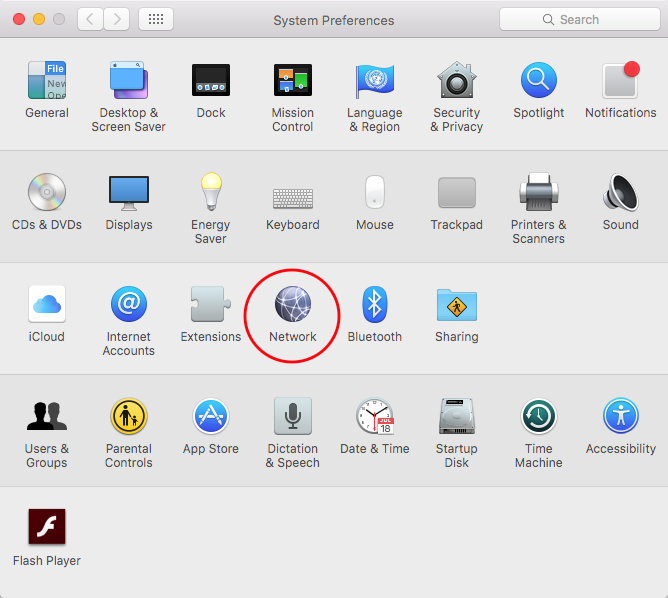
- In the left pane of the Network popup window, click Ethernet.
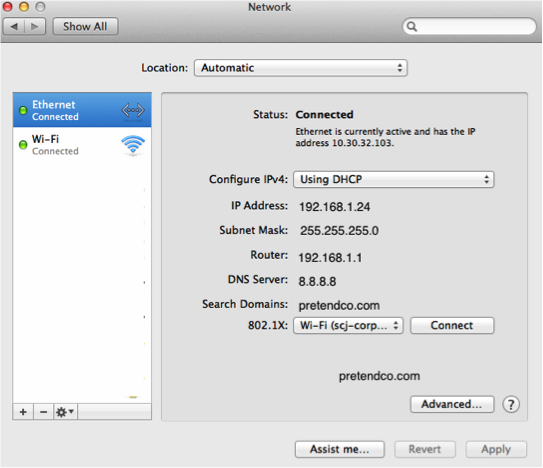
- Before proceeding, check the Configure IPv4 setting:
- If your computer is set to Manual, it is already setup with a static IP address. You do not need to make any changes.
- If your computer is set another option, continue with these steps.
- Take note of the following settings: IP Address, Network Mask, Router, DNS Server, and Search Domains.
You may need to re-enter them after changing the configuration. - Click the Configure IPv4 dropdown and select Manual.
Warning: DO NOT click Apply yet. - If the Subnet Mask and Router settings change, re-enter the values you noted in Step 5.
- For the reset IP Address, enter an unused IP address in your network range.
Note: This will vary depending on your individual network. Contact your network administrator for assistance.
Example: In the network above, DHCP assigned an IP address of 192.168.1.24. We will be changing the last octet (digits between the period) of the address above. In our example, we know that each octet only goes up to 255, so we can assume the IP range that DHCP is handing out is between 192.168.1.1 and 192.168.1.255. We will pick a high number so it's less likely that DHCP will assign another computer that same address: 192.168.1.250. - Click Apply.
Note: The DNS Server and Search Domains fields become empty; you will update them next.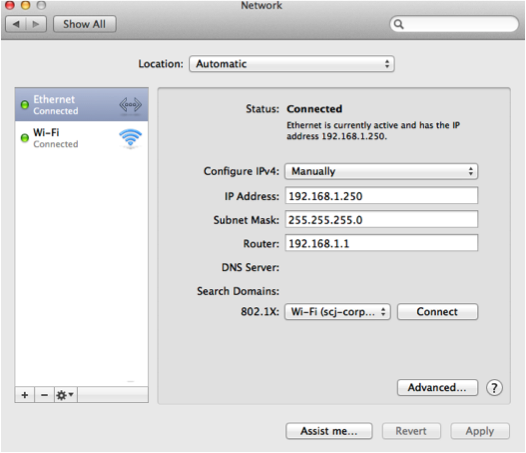
- Click the Advanced button.
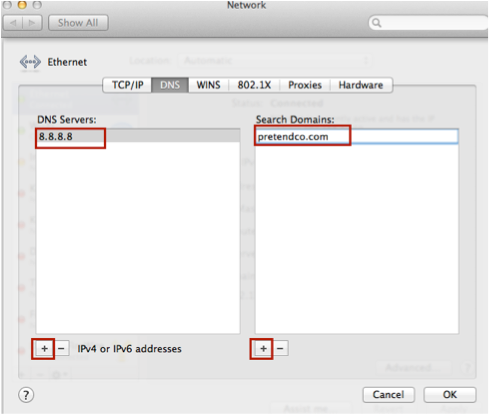
- Click the DNS tab.
- For DNS Servers, click the Plus [+] button, then enter the DNS Server number you noted in Step 5.
- For Search Domains, click the Plus [+] button, then enter the domain you noted in Step 5.
- Click OK.
- Click Apply.


For additional assistance, please contact MC Services at 262-522-6950.