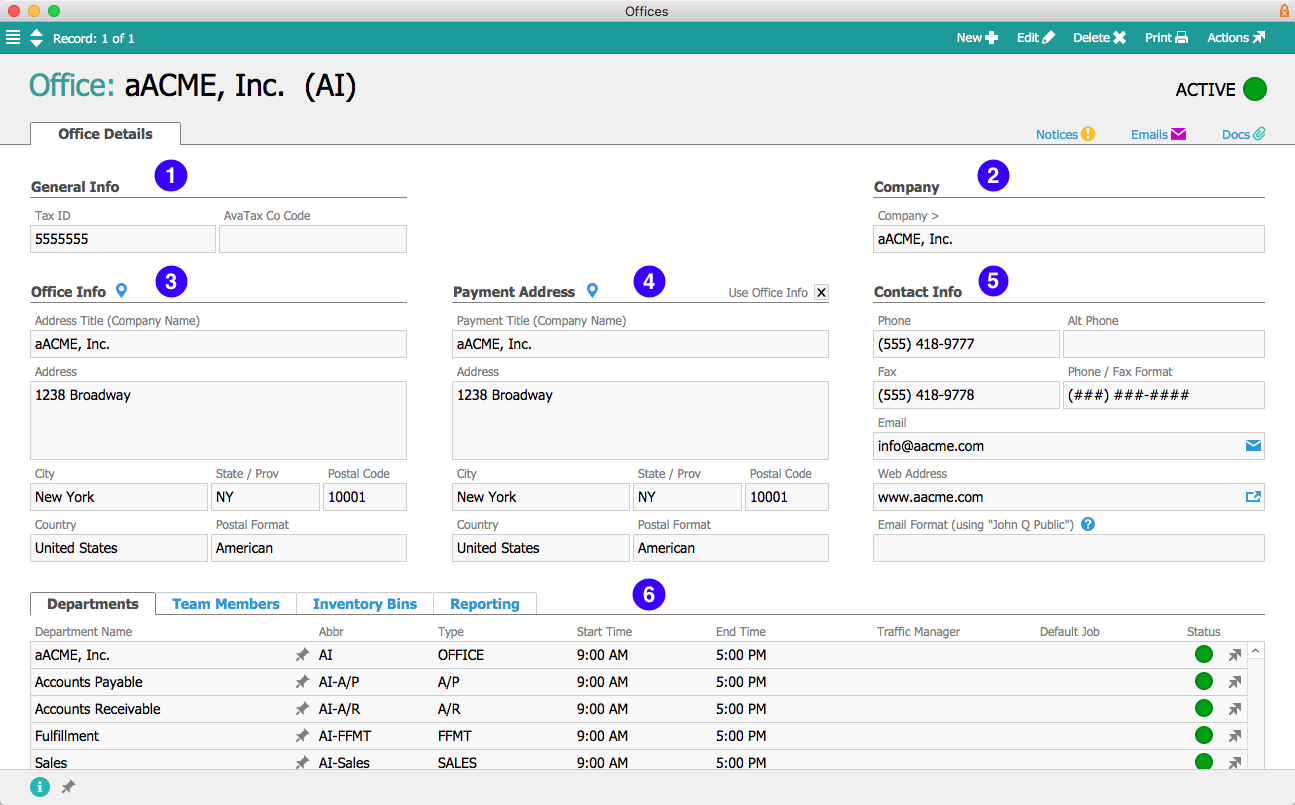
Use the Offices module to set up your company's offices (whether distinguished as separate business entities or separate locations for a single agency). Each office record can have its own set of departments, team members, traffic managers, inventory bins, and report branding.
To create new offices, click the New button and enter information for the required fields (i.e. Office Name, Office Abbr, Tax ID, Address Title, Address Street, Address City, Postal Code).

- General Info – Records the office's Tax ID number; also the AvaTax company code, for aACE+ AvaTax customers.
- Company – Links to the Company record associated with this office.
- Office Info – Contains the office's primary address. Click the Location icon (
 ) to open a web browser and see the address in Google Maps.
 - Payment Address - Contains the address where payments to the office are received. You can copy the data from the Office Info section by marking the Use Office Info flag.
- Contact Info – Contains phone, fax, email, and web contact information for the office, as well as formatting conventions for those fields.
- Departments / Team Members / Inventory Bins / Reporting – On these tabs, you can create departments within the office, view team members assigned to the office, create inventory bins for it, and upload office-specific report branding.
Note: When team members log in to aACE, their office assignment is noted by the office initials at the bottom of the main menu. If the correct preferences are set in the User Groups module, users assigned to multiple offices can quickly switch views by clicking the office initials on the main menu and selecting a different office. When a team member creates an order record, only the line item codes that are associated with the same office will be visible for selection.