aACE's integration with the third-party developer, SeedCode, creates a work calendar with exceptional, continually evolving functionality. The DayBack calendar is designed to help you focus on 'what you're supposed to be doing, rather than where you're supposed to be'. The calendar layout and tools are concentrated on preventing information overload and enabling quick drill-down into work events. In short, it emphasizes jobs and tasks, rather than meeting schedules.
To see how this functionality can help your team, read our feature highlight.
Setting Up the Calendar
System administrators can customize the events shown on the calendar, the colors used to highlight these events, and the resources available on the calendar for tracking assignments.
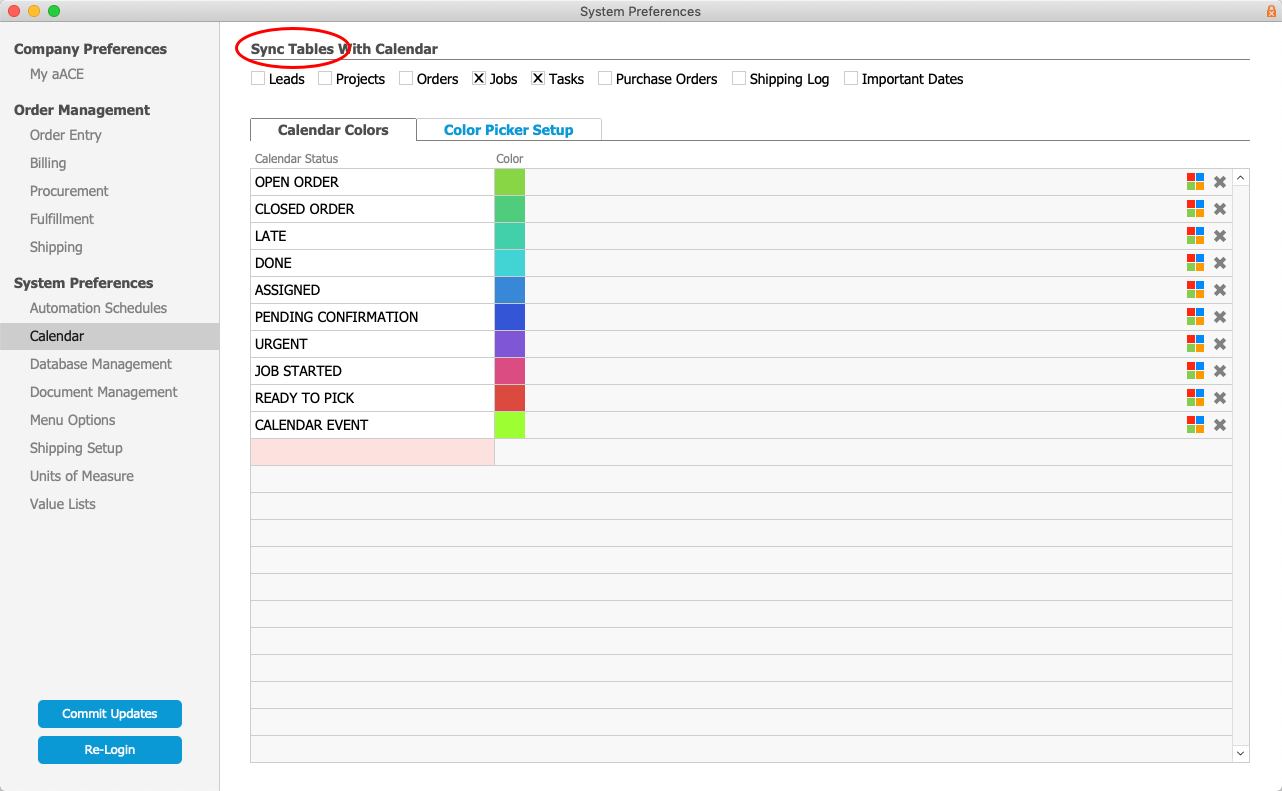
Syncing aACE Tables with the Calendar
Navigate to Menu > System Admin > Preferences > Calendar. At the top of the Calendar preferences screen, you can mark the flags for various aACE tables. When a flag is marked, records from that table will be displayed on the calendar for all aACE users. We recommend that when you first start working with the calendar, mark only a few tables, focusing on the business processes that are most important for your organization to coordinate. As your team members become more comfortable with the calendar functionality, you can gradually add data from other tables.
aACE updates the calendar via the Calendar Sync automation schedule. Changes on the calendar might not be visible until after the schedule runs again.
Working with Calendar Colors and Record Statuses
You can display the default view of the calendar with the Main Menu's Quick Link ( ). You can also display specific records in the calendar from various aACE modules that have direct links (
 ). If the calendar is already open when you click one of these links, the calendar simply refreshes.
In the Calendar Colors tab, the values listed come from various aACE record tracking statuses. Your system administrator can edit these values:
Adding a Status
- In aACE, create a new tracking status.
- Navigate to Menu > System Admin > Preferences > Calendar.
- In the first open line of the status list, enter the new status.
- Click the Color Picker (
 ) and select a color swatch.
 - Relaunch the calendar.
After the Calendar Sync automation schedule runs, the new status will be shown in Filters list and records with that status can be displayed.
Removing a Status
Navigate to Menu > System Admin > Preferences > Calendar, and click the Delete icon ( ) at the right side of the status row. Then relaunch the calendar.
Changing the Color for a Status
Out-of-the-box, calendar colors are a global setting, applicable to all users. This unified system is often helpful when multiple departments need to coordinate (e.g. 1 color has 1 meaning for all users).
You can easily change a status color to another existing color by clicking the Color Picker ( ) and selecting the desired color swatch.
You can also add custom colors; however, the Color Picker can only display 78 swatches at one time, so you must first delete an existing color before uploading a new one:
- Prepare a small .PNG file filled with the new color and note the specific RGB settings.
- Navigate to Menu > System Admin > Preferences > Calendar.
- Click the Color Picker Setup tab.
- Locate a color swatch to remove, then click the Delete icon (
 ) at the right side of the status row.
 - Scroll down to the bottom of the color list, then drag your new color .PNG file onto the blank color block.
- Enter the new color's RGB settings. (Note: The 'A' column represents the alpha parameter — a number between 0.0, for full transparency, and 1.0, for full opacity.)
The new color will be available for use when you go back to the Calendar Colors tab and click the Color Picker ( ).
).
Resources List
System administrators can customize the resource labels shown in the calendar by editing the "CAL: Resources" value list.
Working with Calendar Events
Event markers and placement on the calendar come from the event record's most relevant date field(s):
- Leads — A block shown on the Next Step date
- Projects — A bar stretching from the Start Date to the End Date
- Orders — A block shown on the End (Delivery) date
- Jobs — A bar stretching from the Date Start to the Date End
- Tasks — A bar stretching from the Date Start to the Date End
- Purchase Orders — A block shown on the Required By date
- Shipping Log — A block shown on the Delivery Date
- Important Dates — A block shown on the Date for the team member's personal event
Tips
- To reload the calendar, click the Refresh icon (
 ) in the banner. You can also right-click on the calendar and select Reload.
 - To display the aACE record for an event, click on the calendar event.
- To reschedule an event, click-and-drag the event to a new placement on the calendar. This change is synced back to aACE, updating the date field and logging the details of who made the change. Note: Task group events are anchored — changing one task creates adjustments to the subsequent tasks; these adjustments are displayed after reloading the calendar.
- To display events scheduled for timeframes outside the dates currently shown (e.g. next month), click the event counter in the upper-left corner — the Current Event List displays. Note: Clicking a date in this list jumps to that event's placement on the calendar.
- To limit the view to certain events, use the Filters tab:
- In the Text Search field, type a term — the calendar immediately displays only events that include your term.
- In the Status Filters List, click a status setting — the calendar displays only events with that status.
- a users select which events they want to see on the calendar; no filters selected = shows all events
- To display all events, scroll to the bottom of the Status Filters List, click Advanced Filters, click Clear All Fields, then click Apply & Close.
- To customize which events are displayed, scroll to the bottom of the Status Filters List, click Advanced Filters, then enter the desired settings. Note: These settings revert to the defaults when you close the calendar.
- To change how dates and events are displayed:
- Settings Tab — adjusts various details of how time is marked on the calendar.
- Horizon View — arranges events in a Gantt-style layout, with optional analytics.
- Resource View — arranges events based on assignments to your resources, with optional analytics. (See "Resources List" above.)
- To display tips and best practices from the DayBack site, click the Help links (
 ).
).
 ) in the banner. You can also right-click on the calendar and select Reload.
 ).
).