This guide explains how to properly export data from a report to a spreadsheet. It is intended for advanced users.
You can use a more hands-on method to export data from aACE reports to an Excel spreadsheet. This method groups the exported data, creating sub-summaries to parallel the data layout from the report.
- Navigate from the Main Menu to the desired module.
- Click Print > Open Report Selector > select report.
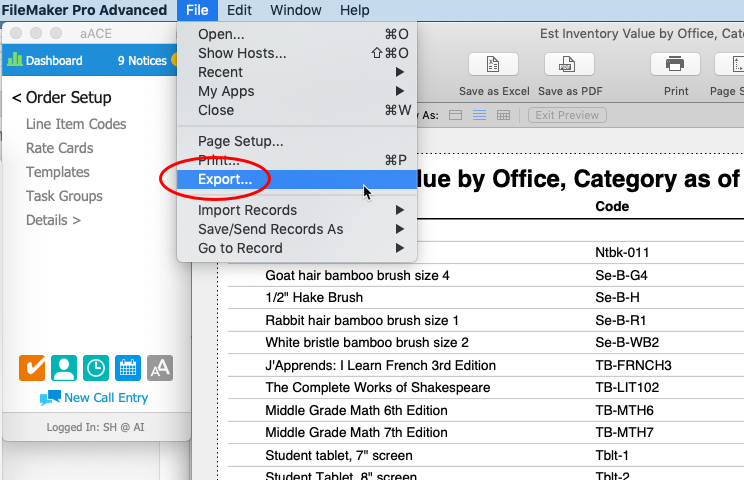
Note: Some reports prompt you for additional input (e.g. As-Of dates). - With the generated report displayed, in the FileMaker menu, click File > Export.
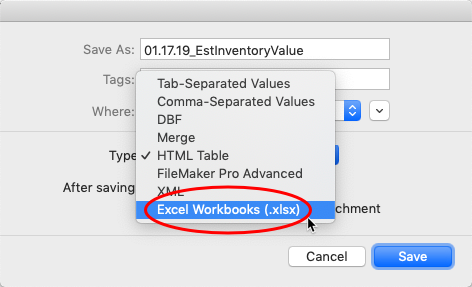
- At the export options dialog, name the file, note where it will be saved, set the file type to Excel Workbooks (.xlsx), then click Save.
- If the dialog appears for setting Excel Options, you can enter the requested info or simply click Continue... to proceed.
- At the dialog to Specify Field Order for Export, select which fields should be included in the exported data.
Note: Because these are all fields that appeared on the report, we recommend that you select Move All.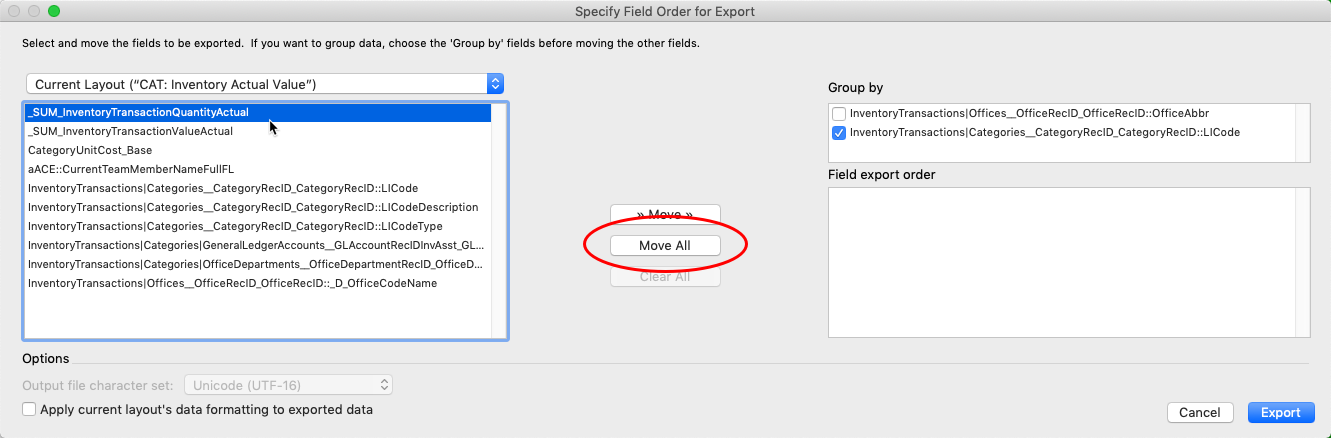
- In the Group By field, select the desired option.
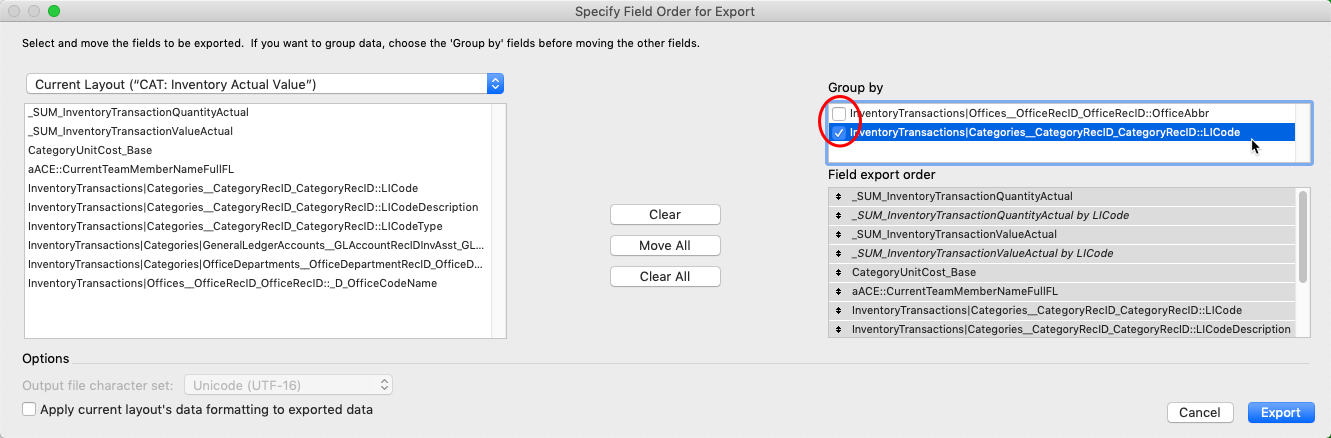
- Click Export.


Results from Exporting
When you open the Excel spreadsheet, it includes summary information for various groupings:
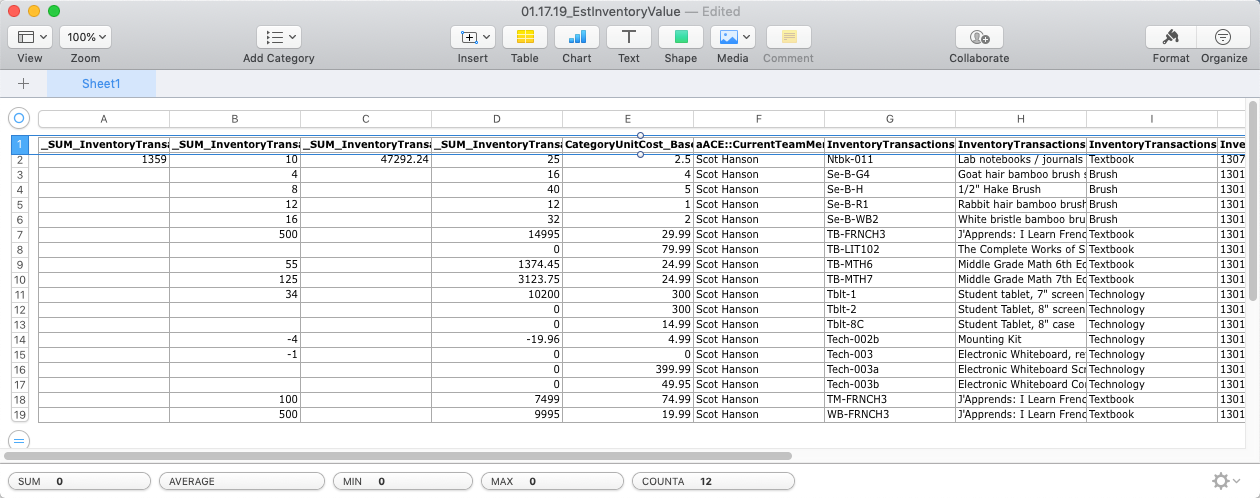
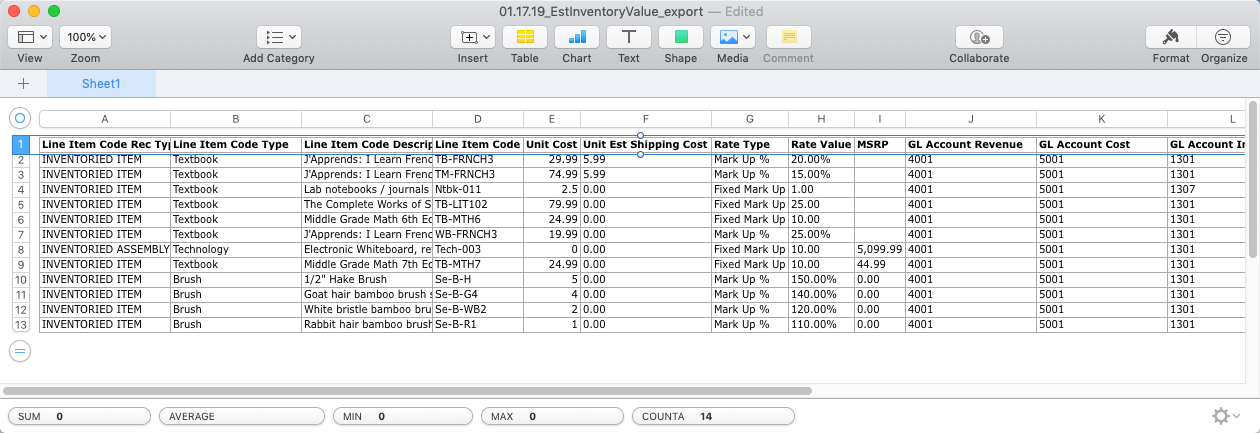
In contrast, an export of the same data directly from the module (in this example, the line item codes) shows only record-specific, non-summarized information: