This guide explains how to complete basic tasks with purchases. It is intended for beginning users.
Purchase Orders vs Purchases
After a purchase order is filled and the related purchase is logged, the expense is realized in the accounting modules. The purchase record impacts the accounting system. In contrast, the purchase order itself only reflects an anticipated purchase, so it does not impact accounting.
Purchase Records
The detail view gives you access to extended information about a specific record, including vendor information, the related POs, related jobs (if any), and portals to related disbursements, adjustments, and refunds.

Purchase Date and Vendor Invoice Date
aACE allows you to either constrain the Purchase Date to always match a Vendor Invoice Date or to allow users to manually enter the Purchase Date, depending on your company policies. For example, a vendor might complete work in June, but send an invoice for that work in July. In this situation, you might want a June purchase to reflect the July invoice.
Your system administrator can configure aACE to link the two dates together or to keep them separate. Navigate from Main Menu > Accounting > Preferences > Data Entry > Date Management: Update Purchase Date to Vendor Invoice Date. With this flag marked, the Purchase Date cannot be edited after the Invoice Date is entered.
Use Tax Flag
In the bottom-right section for Totals, you can mark the Use Tax flag to include a purchase in Use Tax calculations.
Related Disbursements, Adjustments, and Refunds
At each of these sub-tabs, you can use the Plus icon to quickly create records. You can also click the go-to arrow (>) to jump to these related records:
- Disbursements — Funds sent with various methods of payment to a vendor.
- Adjustments — Purchase records that are offsetting to a related Purchase. (Read more about entering purchase adjustments.)
- Refunds — Payments back to your company from a vendor. In most cases, these are a return of an over-payment or a restoration of funds due to returned or damaged merchandise. (Read more about vendor refunds.)
Entering a Purchase (or Vendor Invoice)
You can enter a purchase from multiple locations in the system.
From the Purchase Orders Module
- Navigate from Main Menu > Accts Payable > Purchase Orders.
- Use the Quick Search bar to locate the desired purchase order (PO).
- On the detail view, click Management > Purchases > New (
 ) > Purchase.
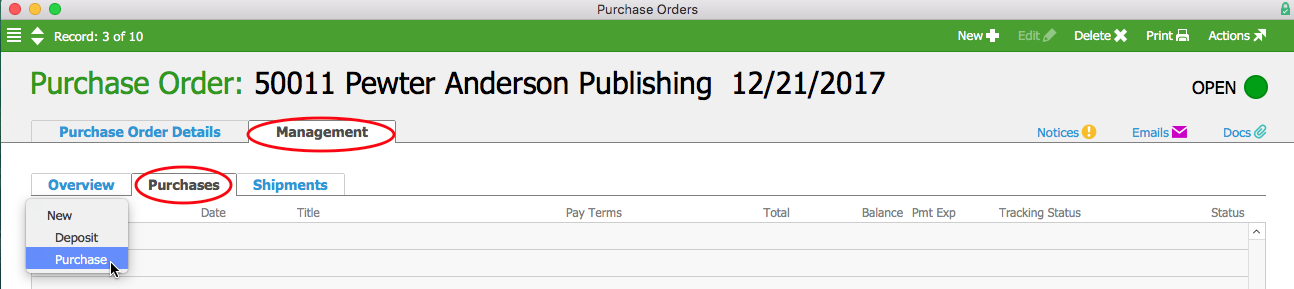
- On the new purchase record, enter the vendor invoice details.
- Click Save and Open.

From the Purchases Module
When a vendor's invoice covers multiple POs, it can be helpful to process the invoice directly from the Purchases module. You can quickly create a new purchase record, then populate it using Actions > Import Purchase Items. This allows you to import multiple purchase items from a spreadsheet or .CSV file (e.g. a monthly credit card statement).
Warning: When you process a vendor's invoice at the Purchases module, the purchase record does not link back to a PO and aACE does not cross-check expected charges. To cross-reference POs or to capture manufacturer lot or serialized number tracking, you must process the invoice from the PO module (see above).
- Navigate from Main Menu > Accts Payable > Purchases, then click New.
- Select the appropriate Vendor.
Note: Unbilled purchase items for that vendor are typically auto-populated, including the related PO numbers. However, if the Qty column shows zeroes, it may be because your system preferences are currently configured to not allow purchases for goods that have not been received. Coordinate with your system administrator.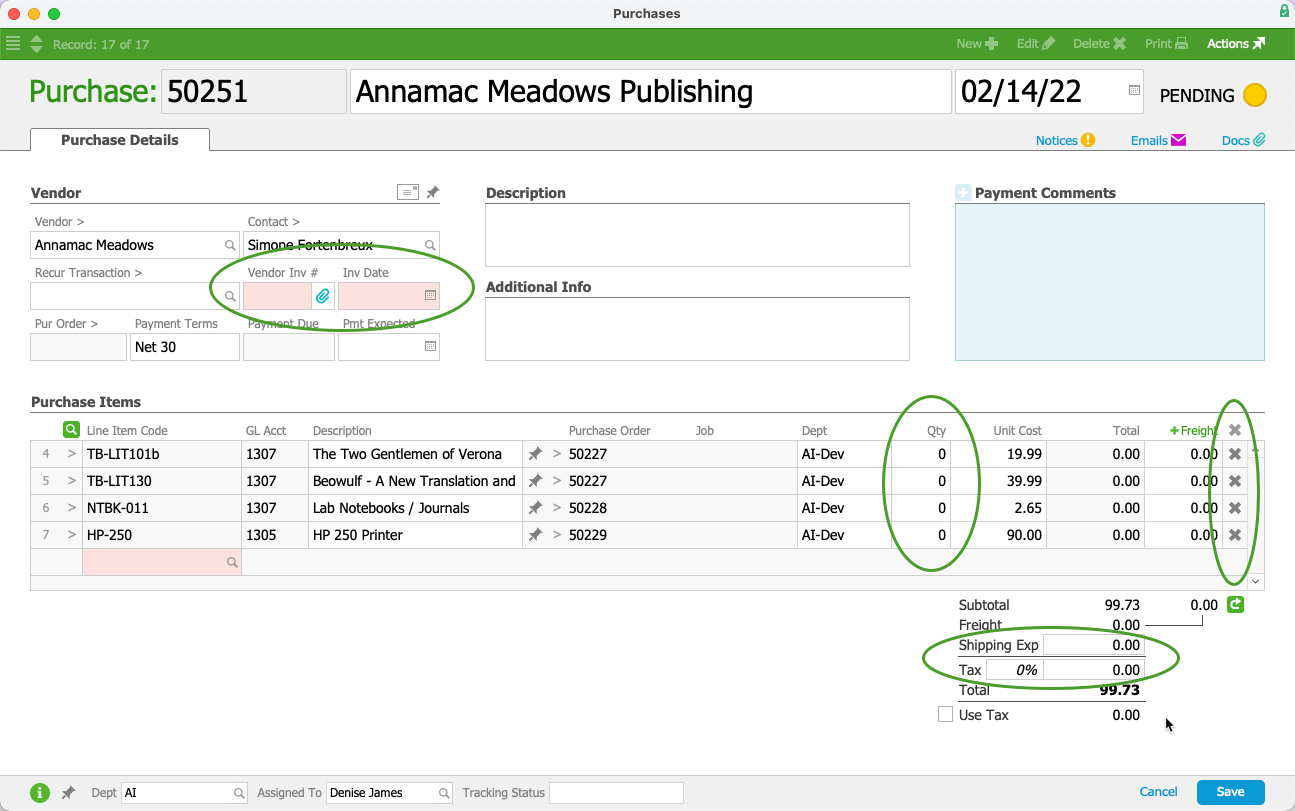
- Remove each item not referenced on the vendor's bill by clicking the item row's X.
- In the Vendor section, enter the Vendor Inv # and Inv Date.
- In the Totals section, enter the amount of shipping and tax; if needed, mark the Use Tax flag .
- Click Save and Open.

Importing Purchase Records
aACE provides robust functionality for importing data. When you download the import spreadsheet for purchases, you must include the following columns of required data:
- Purchase Date — Any date in mm/dd/yyyy format.
- Department Abbr — This code must match a department in your system.
- Assigned To — These initials must match a team member record in your system.
- Company Abbr — This code must match a customer company record in your system.
- Purchase Order ID — This number must match a current PO in your system.
Note: If you are importing a purchase with a historical balance, then the PO ID column is not required. - Vendor Invoice ID
- Vendor Invoice Date — Any date in mm/dd/yyyy format.
Note: You can also quickly generate a spreadsheet for importing records by clicking Actions > Export Purchases, then editing the spreadsheet. A spreadsheet exported this way from active purchases will not include a column for Historical.
Imported purchases are left in Pending status for you to review or edit.
Purchase Adjustments
You can adjust purchases that are in Open or Closed status. (For purchases in Pending status, simply edit the record.) When you create a purchase adjustment record, it does not carry its own balance; instead, it affects the balance of the original transaction.
- Navigate to Menu > Accts Payable > Purchases, then locate the desired purchase record.
- From the detail view, create the adjustment record by either:
- Clicking Actions > Credit/Adjust Purchase > Adjust.
- Navigating to the Adjustments tab, then clicking Plus (
 ) > Adjust.
- At the adjustment record, enter the necessary changes (e.g. remove items, update quantities, change tax or shipping amounts, etc).
- Click Save, then Open.
 ) > Adjust.
Vendor Credit Memos with Purchases
Vendor credit memos are recorded in aACE as open purchase records with a negative balance. These records typically occur if you create and post a purchase, pay it (in part or in full), and then credit/adjust the purchase (e.g. returning some items to the vendor). Rather than receiving a refund, you keep the 'negative purchase' to apply as a credit later.
If a different set of events result in a credit, you can simply create a negative purchase and open it until it's ready to apply.