Notices are messages delivered within your aACE system to other users. They can streamline communications by making it unnecessary to shift to another tool to record conversations about work tasks. Notices usually include a link back to the record(s) that are referenced.
There are three screens where team members can work with notices. Depending on user roles and aACE system configuration, some users may not be able to access all these screens:
- Notices module — Access by navigating from Main Menu > Internal > Notices
- My Notices module — Access via Main Menu link
- Notices Viewer — Access via the Notices link on most module headers
Notices Module
This module initially displays a list of all incomplete notices. This listing provides info about team members currently assigned to each notice and the notice setup that generated it. The list view allows you to search, sort, filter, and work with batches of notices.
The details view provides additional info and functionality:

- Issued By — Provides a go-to link to the team member who issued the notice.
Note: Some notices are auto-generated by triggering events. The Issued By team member for these notices is typically the person who completed that event. - Message — Summarizes the purpose for the notice using standard text from the notice setup template.
- Link To — Provides a go-to link to the related record(s).
- Setup — Provides go-to links to the assigned team and the related notice setup.
- Recipients — Lists all team members who are being notified about the event, including their active contact methods. Note: The Single User Completion flag enables one individual to complete the notice for all other recipients. If this flag is not marked, the notice must be completed by each recipient.
The Actions menu here enables you to update the status for a single notice or a batch.
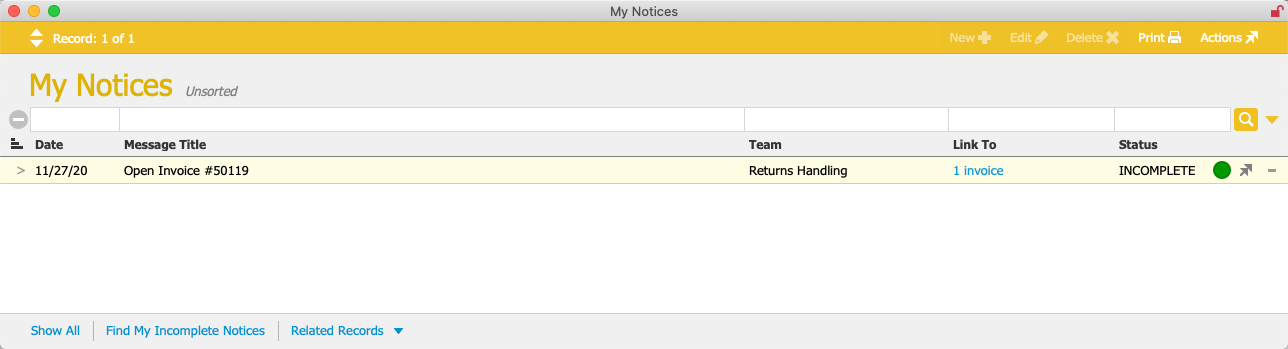
My Notices Module
This module initially focuses on incomplete notices assigned to you (if any). The list view allows you to search, sort, filter, and work with batches of notices.
 The details view includes functionality similar to the Notice module, with some additions:
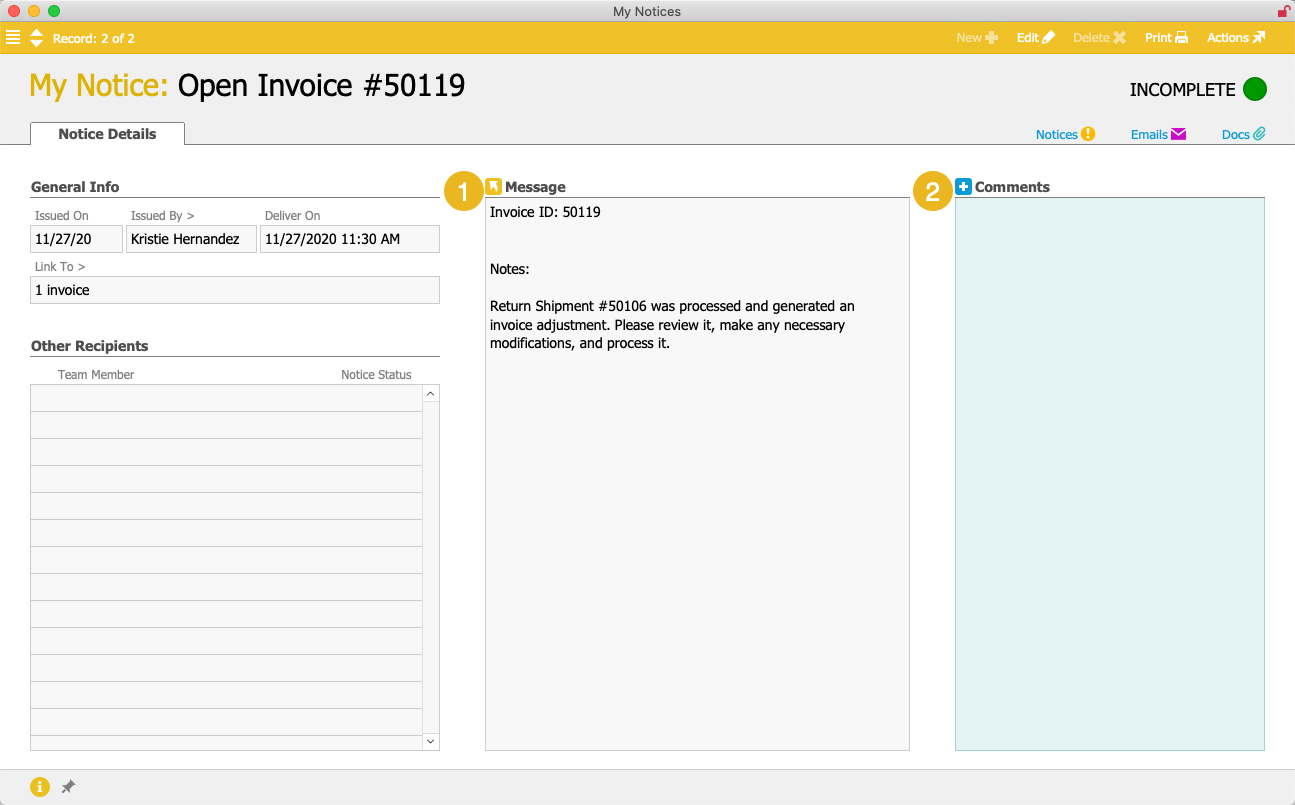
- Message — You can send a response to a message by clicking the Reply icon (
 ). aACE allows you to send your reply to the team member who issued the notice or to all team members who received the notice. When you send the reply, aACE automatically changes the notice status for you to Complete, but changes the status for the other team members to Incomplete.
 - Comments — You can record ongoing conversations about the event by clicking the Add icon (
 ). Note: Entering a comment does not change the notice status.
 ). aACE allows you to send your reply to the team member who issued the notice or to all team members who received the notice. When you send the reply, aACE automatically changes the notice status for you to Complete, but changes the status for the other team members to Incomplete.
 ). Note: Entering a comment does not change the notice status.
The Actions menu here enables you to update the status or create a task based on a notice. In addition, the View Logs option gives extra detail about every activity related to this notice record.
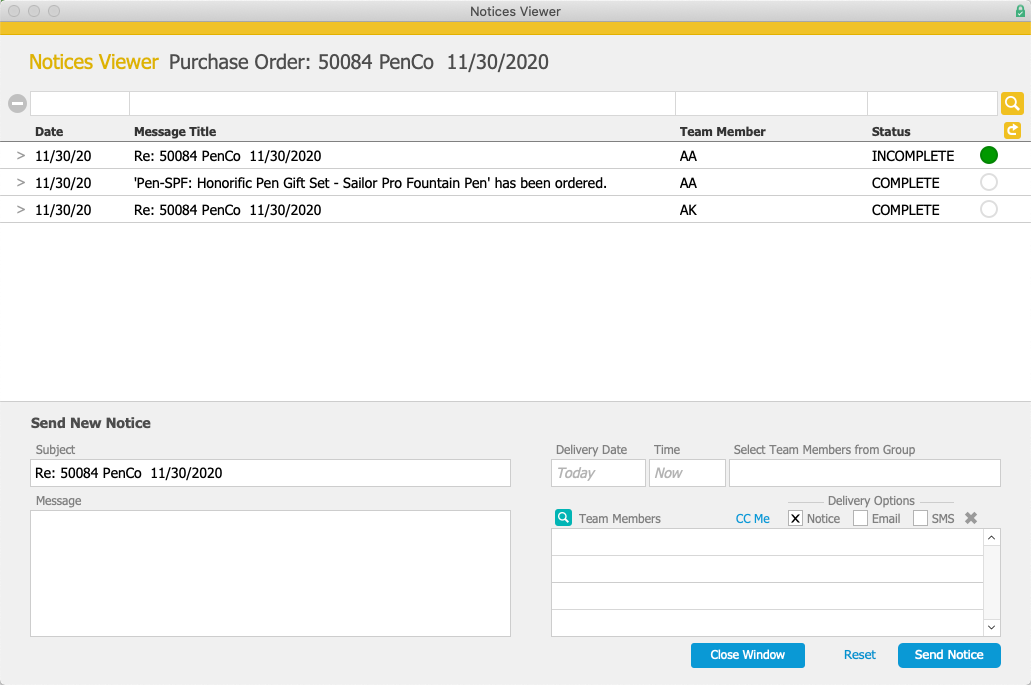
Notices Viewer
This popover screen displays notice information pertaining to a specific record and enables you to send a new notice.
In the list, click on a notice to open the Notices module and view details.
Sending a New Notice
You can create a new message about the record. aACE enables you to specify the date and time when the message should be delivered. This allows you to create 'reminder' messages that stay in Pending status until aACE automatically sends them later.
You can also specify an existing team or search for other team members that should receive your message. The Delivery Options flags let you select which way(s) the notice should be sent out. (Note: Email and SMS text messages can only be sent to team members or contacts who have valid contact information recorded in aACE.)