Certain types of transaction data imports do not require importing header records. Instead you can manually create a header record, then import a spreadsheet of item information into that record. For example, you can create a Count-type inventory adjustment in aACE, then import the LICs and quantities into that record.
- Prepare the import spreadsheet of item records.
- Navigate in aACE to the desired module, then locate or create the header record.
- At the detail view, click Edit.
- Click Actions > Import [module] Items > Continue > Step 3.
- Continue with the standard process to import records.
Including the Header Record ID
Because you are importing into a specific record, aACE automatically supplies the needed record ID number. So you often do not need to include the header record ID on the import spreadsheet.
However, for some item data, you can also import into item-specific modules (e.g. Main Menu > Accts Receivable > Details > Invoice Items). For these imports, you must include the header record ID number.
Example of Importing Item Data into a Header Record
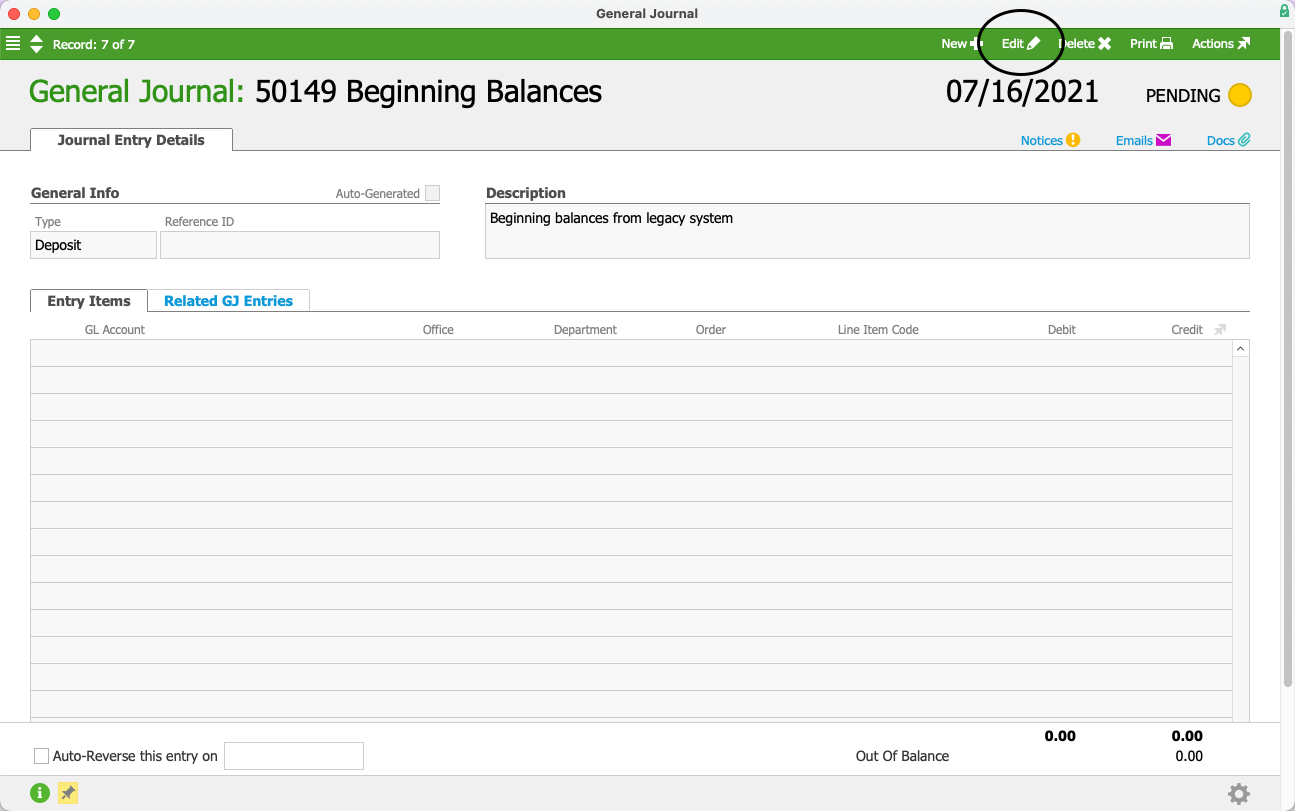
Suppose a company had manually created a general journal entry to enter the beginning balances from another software system. Because the header record already exists, the assigned team member would only need to import the general journal entry items.
First she would adjust the exported spreadsheet of data from the previous software system, making sure it matched with the column headings from the aACE import template for that module. Because she would be importing the GJ entry items directly into an existing aACE record, the record ID number for the GJ entry would not be required on the spreadsheet.
She would navigate to the General Journal module and locate the GJ entry prepared for this import. At the detail view of that record, she would click Edit.
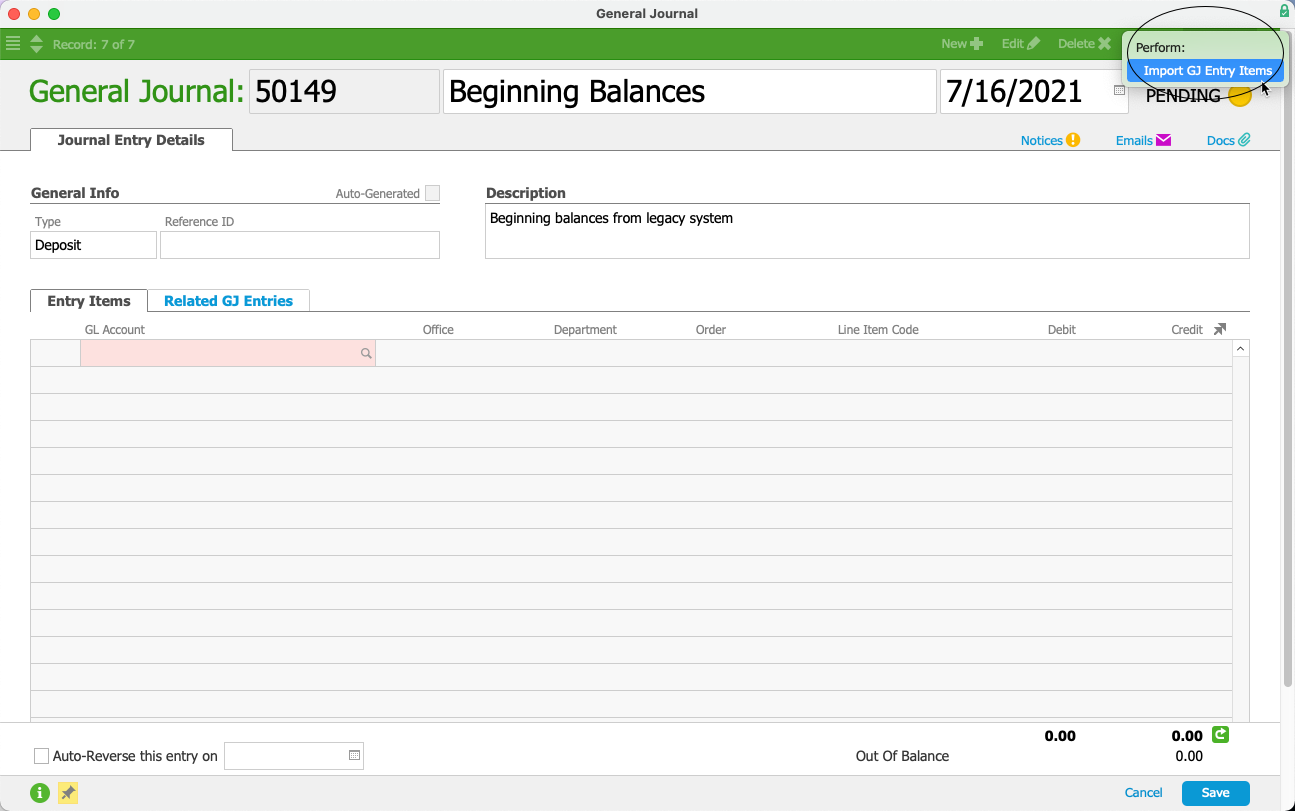
Then she would click Actions > Import GJ Entry Items.
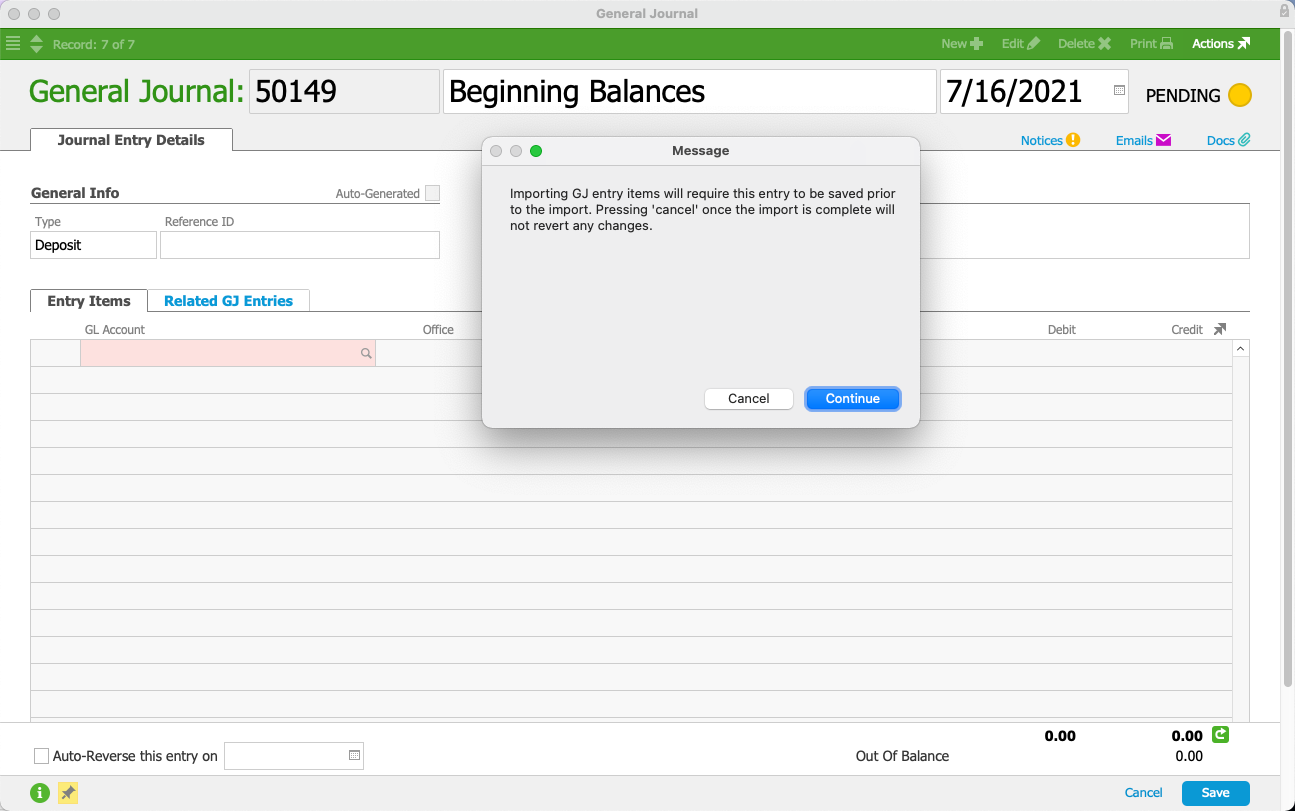
At the first confirmation dialog, she would click Continue.
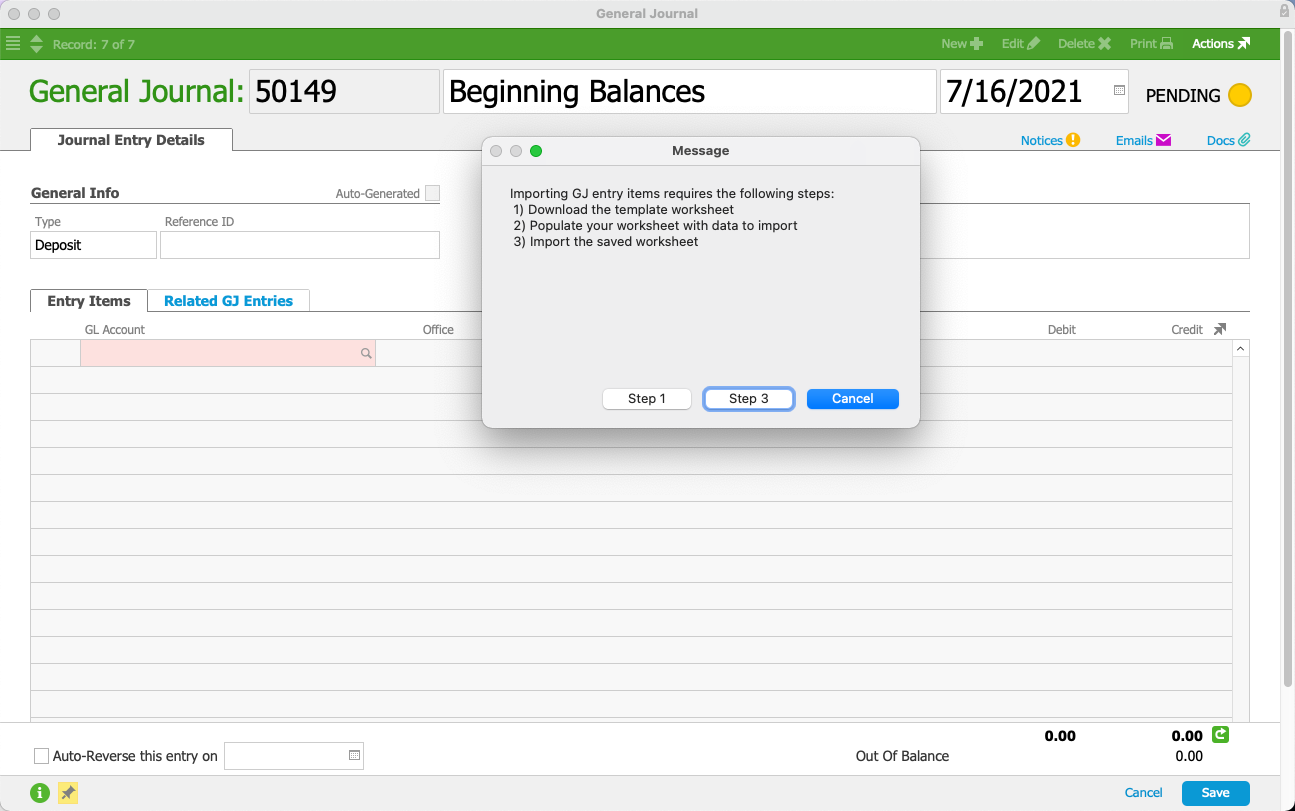
Since she has the import spreadsheet ready, at the second confirmation dialog, she would click Step 3.
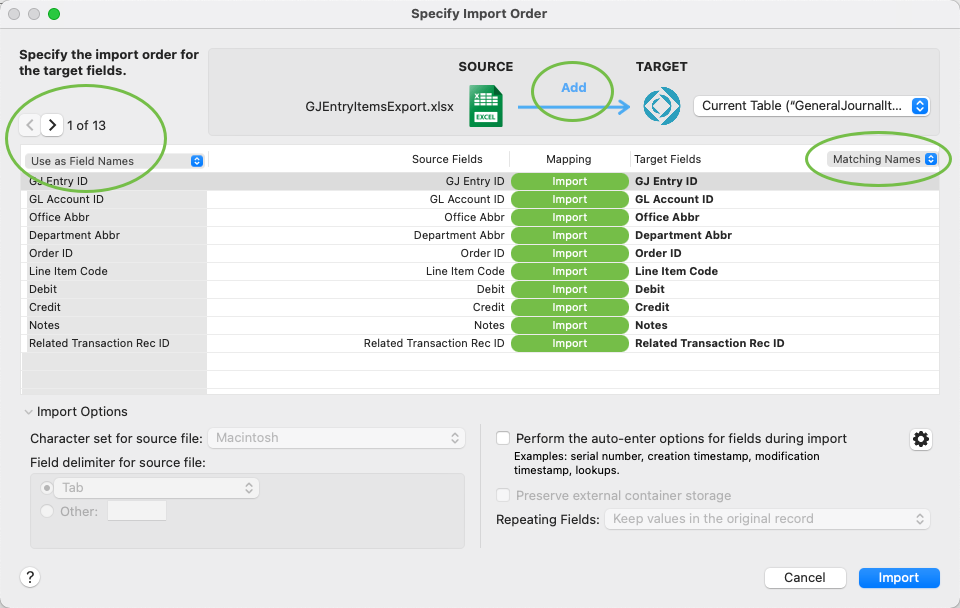
She would locate the prepared spreadsheet and verify that the import is set up correctly:
- Column headings highlighting row 1 and marked for use as field names.
- Add functionality specified.
- Target fields identified as Matching Names.
She would click import, then review the GJ entry items.