This guide explains how to account for a refund from a vendor. It is intended for general users.
After you return items to a vendor, you may need to create a refund record in order to receive refunds for purchases made with cash or checks. (Purchases made with a credit card should be refunded by creating a new, negative disbursement.)
Be sure to follow your company's policies for returns and refunds, as well as the vendor's policies.
Note: If the refund is for a customer payment, the process requires different steps.
Processing Refunds
You can process a refund from a vendor at the Purchases, Receipts, or Disbursements modules.
Vendor Refunds from the Purchases Module
Vendor refunds are typically booked against the parent purchase record. When you start at the original purchase record, it becomes the parent record so you can easily track the other related transactions.
- Navigate from Main Menu > Accts Payable > Purchases.
- Use the Quick Search bar to locate the desired purchase record.
- On that record's detail view, click the Refunds view and click the New (
 ) icon.
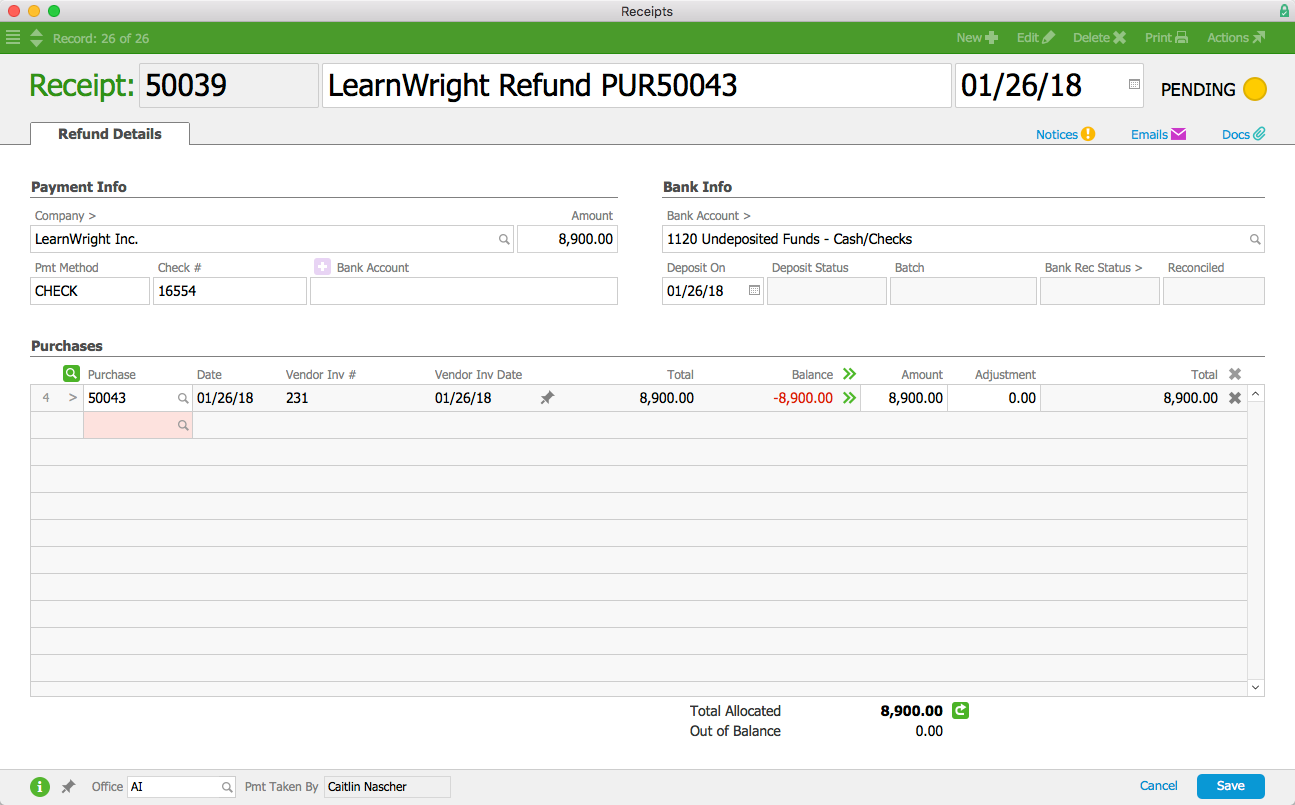
 - On the new refund receipt, enter the details:
- Payment Info Section — Change the refund Amount to a negative value and specify the Payment Method.
- Bank Info Section — Confirm the GL Account the refund will be deposited into and the date of the deposit.
- Purchases Section — Change the purchase Amount to a negative value.

- Click Save, then Post.

The purchase record's Refunds view displays the refund.
The company record's Vendor Details tab also displays the refund value as a negative amount in the A/P Balance field. (Note: If there are other open purchases for this company, the refund amount might be hidden by the payable amounts.)

Vendor Refunds from the Receipts Module
- Navigate from Main Menu > Accts Receivable > Receipts, then click New > Refund.
- On the new receipt record, enter the purchase number and other refund information (as outlined above).
- Click Save and Post.

Vendor Refunds from the Disbursements Module
- Navigate from Main Menu > Accts Payable > Disbursements, then click New > Refund.
- On the new receipt record, enter the refund information (see above), including the original purchase number(s) and amounts this refund will cover.
- Click Save and Post.
Best Practices for Vendor Refunds
We recommend that you make all the needed entries and adjustments so all your records in aACE reflect reality. This will help ensure your accounting / inventory balances remain accurate. Keep these guidelines in mind:
- Log return shipments to the vendor so your inventory balances stay accurate.
- Create the necessary purchase adjustments so the entire transaction balances (e.g. to account for credit coming from your vendor) because these entries affect accounting as realized expenses.
- Update the related PO(s) so anticipated expenses are accurate and your totals for inventory-on-order are correct.
Note: After updating these records, it is also possible to hold the refund as a credit to apply to a purchase later.