aACE provides many standard reports, and you can also print information from detail view screens. If your organization needs a custom reporting option, you can easily request support from within aACE.
General Printing Instructions
- Navigate to the desired module.
- Locate the desired records.
- In the menu bar, click Print and select the desired report.
- In the Print Preview window, select to browse, save, or print the report.
Note: Some reports are configured to retrieve a certain set of records so there is no need to locate specific records before printing (e.g. A/R Receivable Aging - All Records). Other reports may require additional details before you print (e.g. specifying an "as-of" date).
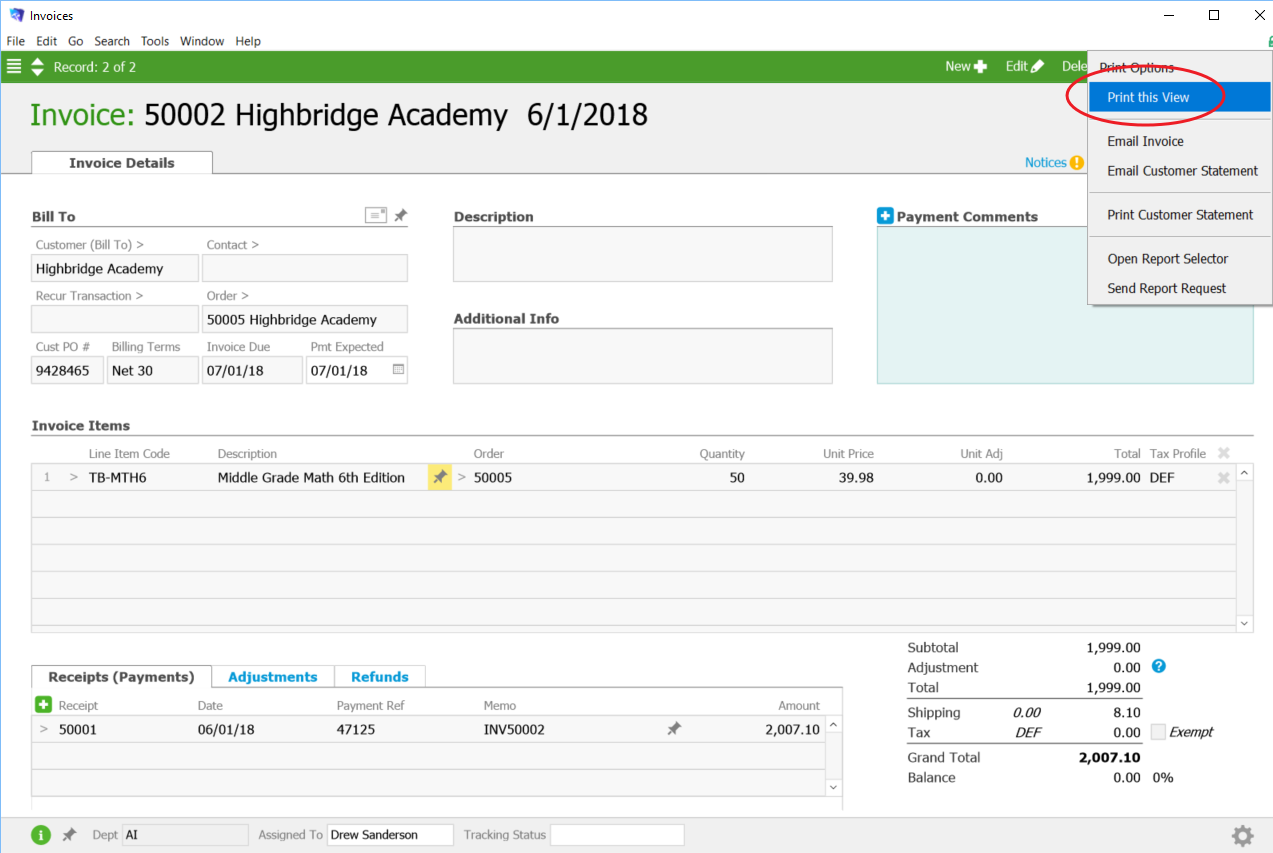
Printing the Detail View
You can print the information about specific records, such as orders, invoices, POs, and tasks. At the detail view menu bar, click Print > Print This View.
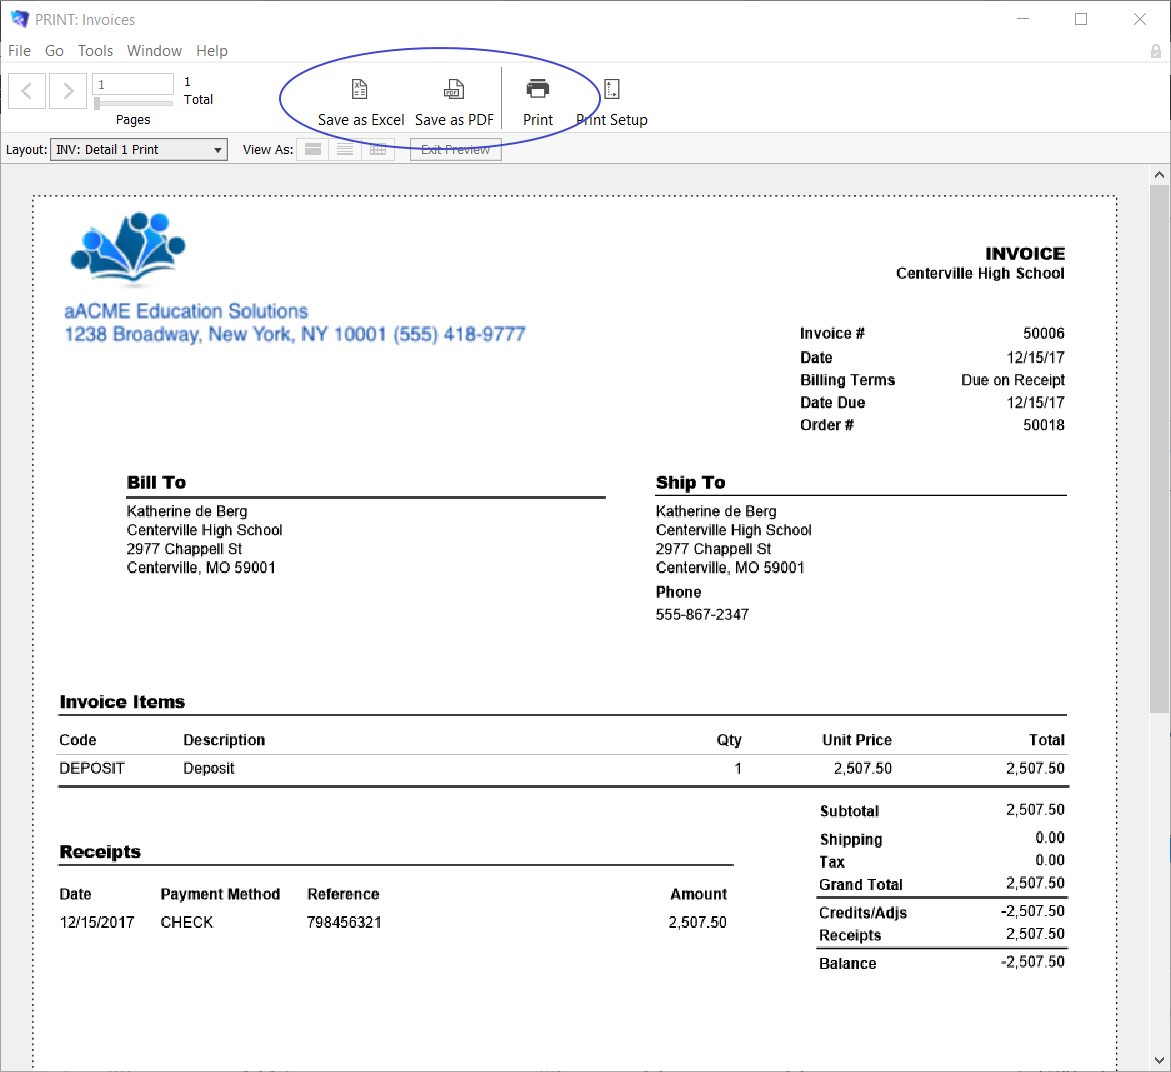
The report appears in preview mode, where you can specify the format:
- Save as Excel - transfers the field names and data, but does not carry over the layout and formatting
- Save as PDF - transfers data, layout, and formatting as shown on the preview
- Print - displays a printing dialog box where you can specify the destination; transfers data, layout, and formatting as shown on the preview

Reports from the Print Menu
Most modules provide a list of reports from the menu bar Print option.
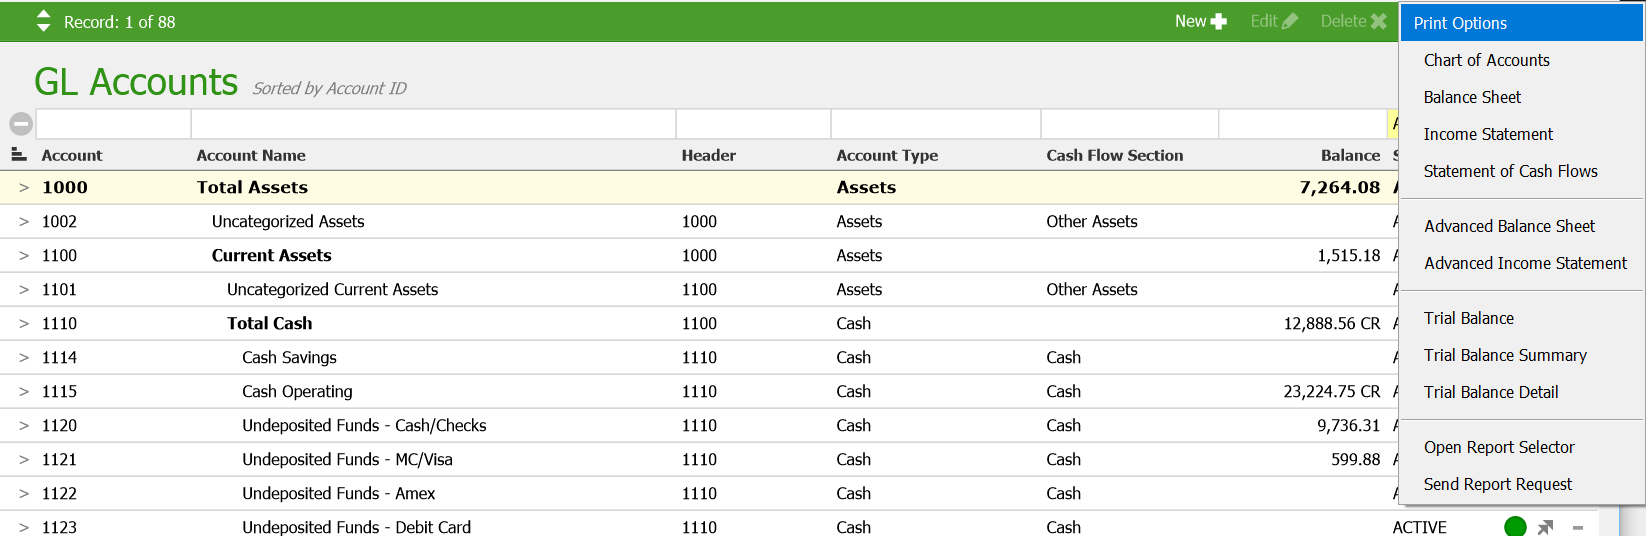
This list can be customized with different reports or even with new, customized reports, as requested by your organization.
Note: Some reports require you to provide additional information (e.g. entering a date range for an aging invoices report).
The Report Selector
In the Print Menu drop-down list, this option opens a new screen for access to even more standard reports. The reports shown in the following screenshot are for the GL Account module; other modules will offer different report options.
- In the menu bar, click Print > Open Report Selector.
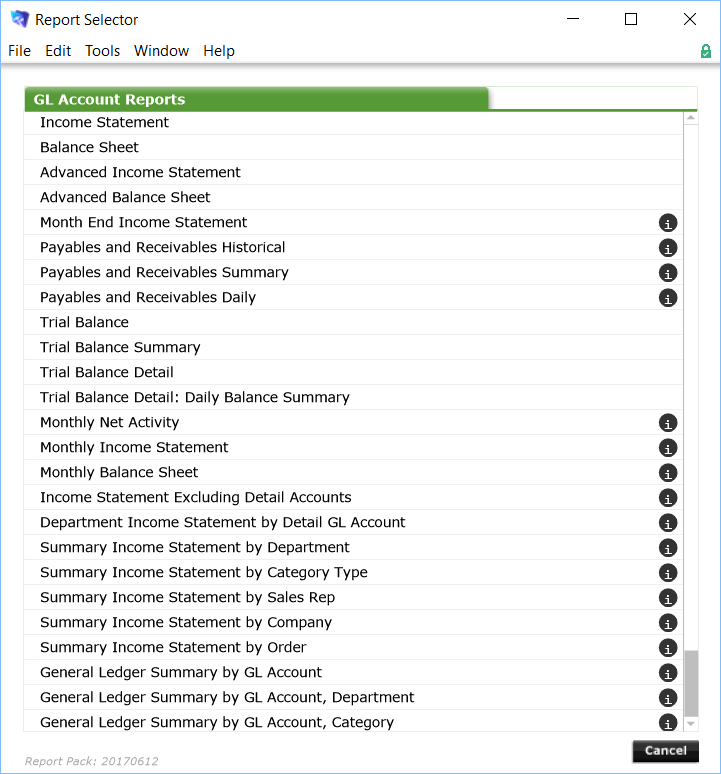
- Scroll to locate the desired report
- Click the report title.
- In the report preview, specify whether to send the report to the printer, save as a PDF, or export to Excel.
