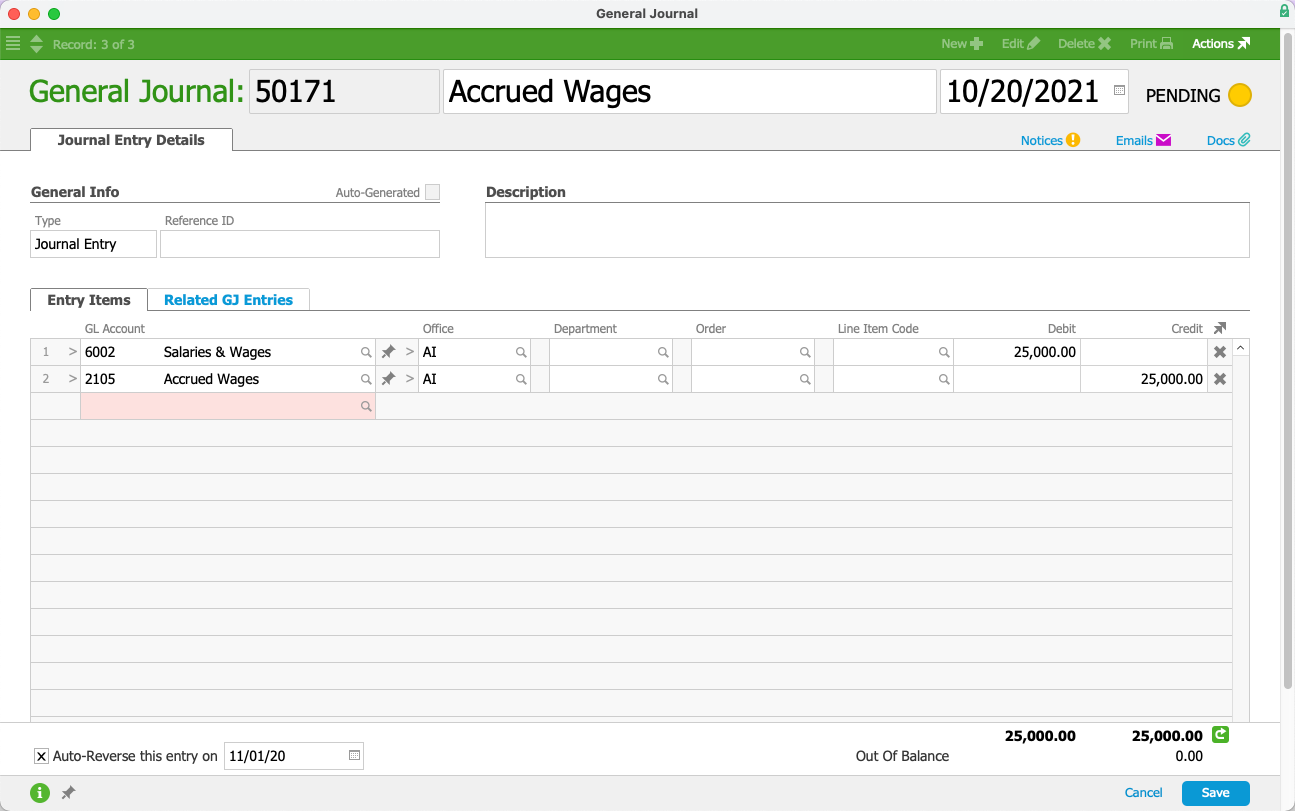
This guide explains how to set up a general journal entry as auto-reversing. It is intended for advanced users.
An auto-reversing journal entry is typically made at the beginning of a reporting period, which reverses out specific entries made in the preceding accounting period. They help avoid errors in reporting when accrued revenue or expenses from one accounting period should not remain on the books for the next.
For example, suppose your business accrues $50,000 of revenue from a customer in April. This revenue is already earned, but the invoice won't be sent to the customer until May. Your A/R staff could create an auto-reversing entry for the accrual dated for the beginning of May. This would reverse out the original $50,000 accrual. If more work is completed for that customer, the May invoice might go up to $60,000. Then, assuming that invoice is paid in May, the result would a recognition of $50,000 in April and $10,000 in May.
To leverage auto-reversing GJ entries, you must mark each GJ entry and also activate the needed automation schedule.
Marking a GJ Entry as Auto-Reversing
- Navigate from Main Menu > Accounting > General Journal.
- Click New > Journal Entry.
- Enter a Title for the entry.
- In the record Date field, you can back-date the GJ entry, if needed.
- Specify the GL Account and Debit value on one line, then the GL Account and Credit value on the next line.

- Mark the flag to 'Auto-Reverse this entry on' and enter the future date when it should be reversed.
Note: You must enter a future date (i.e. tomorrow or later). Using today's date will not trigger the auto-reversing processes. - Click Save.
Posting an Auto-Reversing GJ Entry
To process GJ entries that are flagged with auto-reversing dates, you must also activate the automation schedule titled 'Auto-Reverse GJ Entries'.
When this schedule runs, aACE checks for all GJ entries that have the auto-reverse flag and date set. If the current date matches the date set on a GJ entry, aACE creates and posts the reversing entry.
