This guide explains how to check for outstanding commissions and to create commission statements. It is intended for advanced users.
Commissions can be a very important part of your sales process. aACE gives you the flexibility to make commissions very simple or intricate.
Previewing Commissions
- Navigate from Main Menu > Order Management > Orders.
- Find the order(s) you want to review:
- Click the Admin Actions icon (
 ) and select Find Orders with Open Commissions.
 - If the order you want to review does not have open commissions, use the Quick Search bar to locate it.
- Click the Admin Actions icon (
- At the list view, click Print (
 ) > Print Commissions Detail Report.
Note: For a simple overview, you can also use Print Commissions Summary Report.
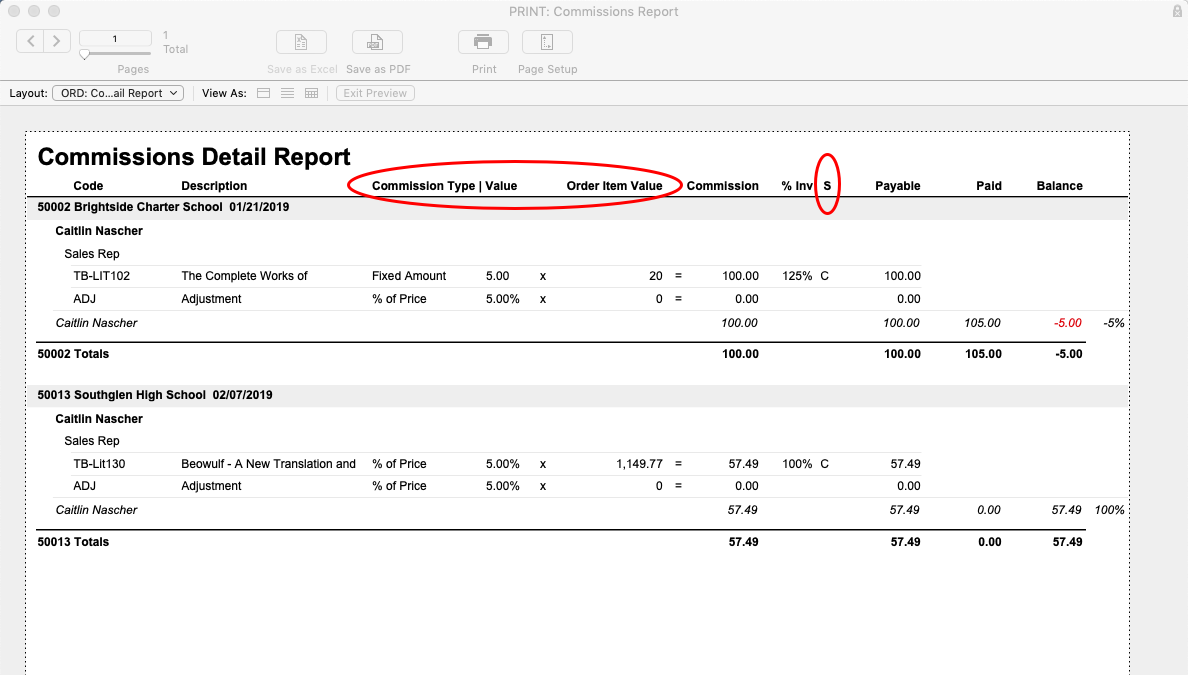
- Review the commission details:
- Verify that the numbers shown for Commission Type | Value and for Order Item Value are correct.
- Verify that the order's invoice Status (next to the % Inv column) shows that all invoices are ready:
- The letter "C" — Invoice has been paid and is in Closed status. These invoices can be used to calculate commissions.
- The letter "O" — Invoice is still in Open status.
- The letter "P" — Invoice is still in Pending status.
- No letter displayed — No invoice has been created.
Resolving Discrepancies
If the Payable amounts do not align with your expectations, use this report to identify and resolve any issues, updating relevant records as needed. After you resolve any problems, be sure to update or reset the commission calculations on the affected orders. Then proceed with generating commission statements (see below).
Generating Commission Statements
You can generate single commission statements one at a time or all eligible statements in a batch. (Note: If needed, you can also manually adjust commission statements.)
Single Statements for Specific Team Members / Referral Companies
- Navigate from Main Menu > Accounting > Comm Statements.
- At the list view, click New.
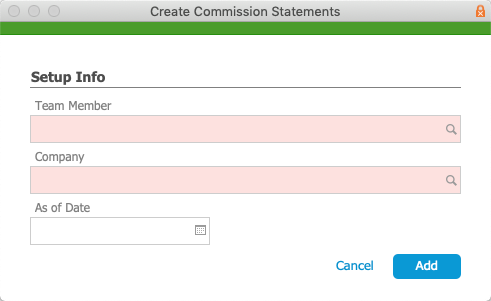
- At the Create Commissions Statements dialog, specify the desired sales rep or referral company.

- Optionally, enter an As Of Date.
Note: The As Of Date constrains the invoices used to generate the statement — only invoices for orders that closed on or before this date are included. The As Of Date is distinct from the Statement date (i.e. the date when the commissions statement was generated). - Click Add.
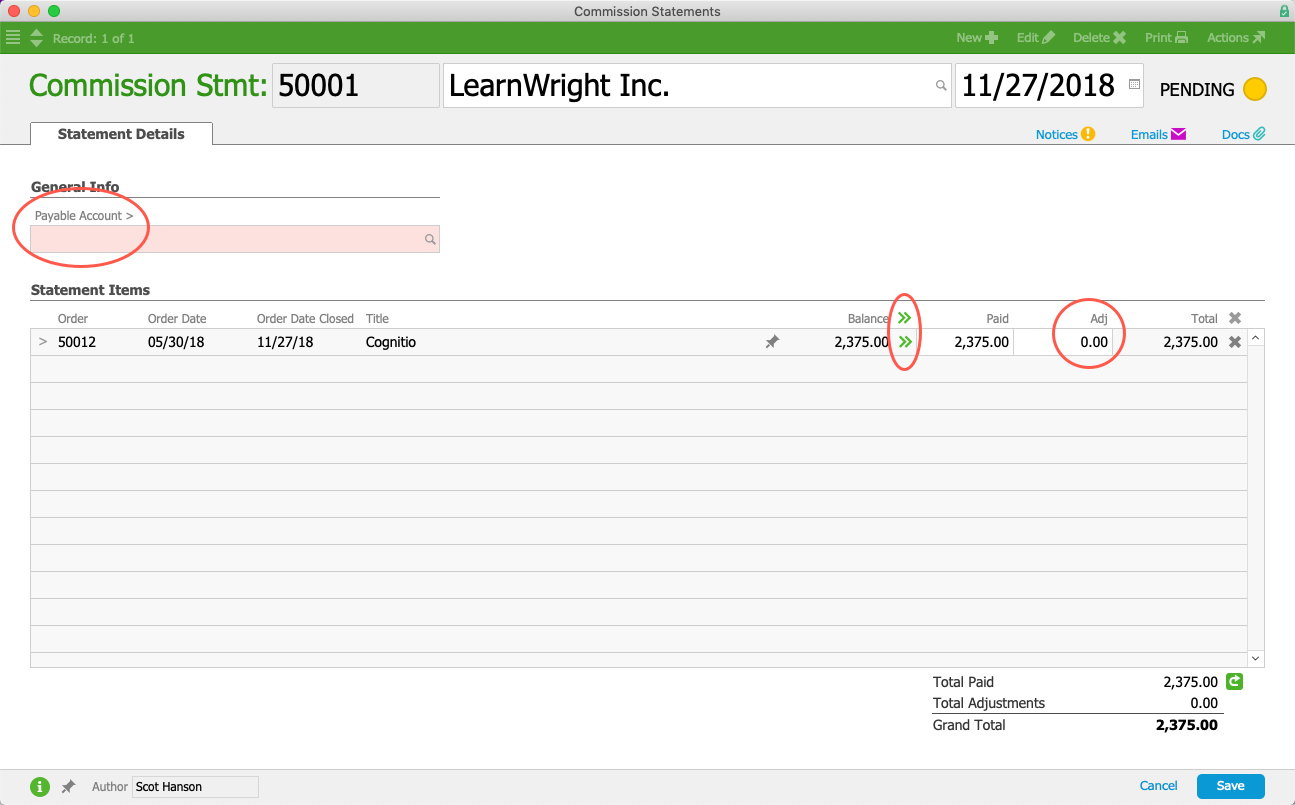
- On the new commission statement record, enter the needed details:
- Payable Account — Specify the general ledger account the commission will be paid from.
- Paid — Enter the commission amount by clicking the Transfer button (
 ) or typing an amount.
 - Adj — Enter any adjustments needed on the payout amount. (Read more about Manually Adjusting Commission Statements.)
Note: If you make any updates on the Commission Stmt, you can preview the totals by clicking the Calculate ( ) icon.
- Click Save, and at the confirmation message, click Post.
To leave the entry in pending state, click Not Yet.
Statements for All Eligible Commissions
- Navigate to Menu > Accounting > Comm Statements.
- In the menu bar, click Actions > Generate Commission Statements.
- Optionally, enter the Limit To Date. (For details, see As Of Date above.)
- At the confirmation dialog, click Yes.

- If needed, you can open specific commission statements and manually adjust the amounts.
- In the menu bar, click Actions > Post Statements In List.
- At the confirmation message, click Post.
 ) > Print Commissions Detail Report.

 ) or typing an amount.
