The Notes feature is available throughout aACE. Notes can be entered for a record or a line item, so they are useful for capturing specific details. In some cases, notes entered in one record will also be displayed on related records (ex: a note entered on a line item at the Order screen will carry over to that line item in the related invoice and shipment records).
Adding Notes
- Navigate to the record you want to capture additional details for.
- Click the gray Notes (
 ) icon.
 - In the pop-up window, enter the information.
- Save the note by clicking outside the pop-up window or clicking on the X icon in the top-right corner.
 ) icon.
Working with Notes
Once a note has been created, the Notes icon is highlighted in yellow.
- To view the full text of a note, click the Notes icon.
- To make changes to a note, view the note and type your updates.
- To delete a note, view the note, then select all the content and delete it.
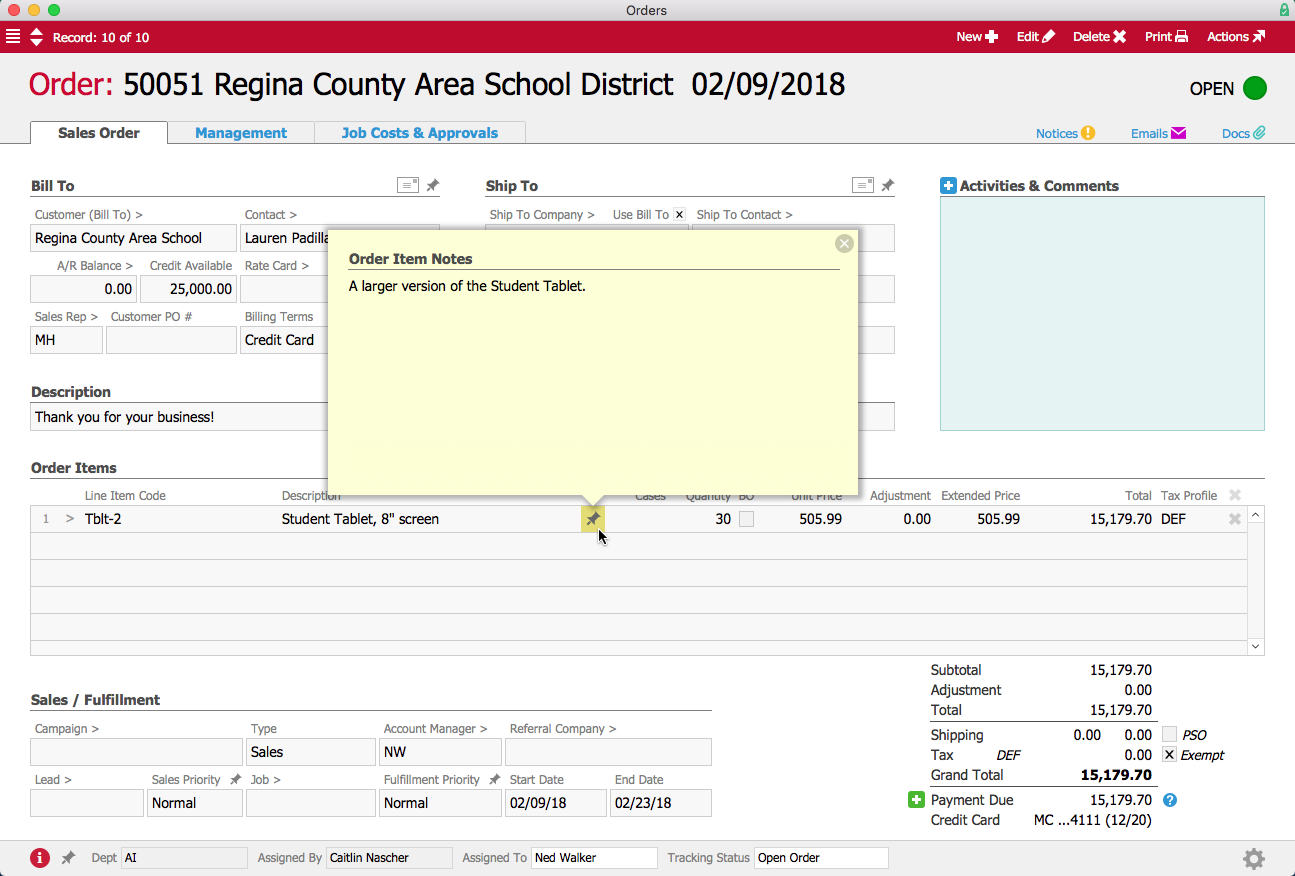
Notes Flow-Through
In the following screenshot, multiple notes are displayed on an order record. Notes recorded here are displayed on other screens, while notes from certain other screens are accessible here:
- Bill To notes – As priority info, this note displays the first several words right on the record, highlighted in yellow. These notes flow from the order to the related invoice.
- Ship To notes – As priority info, this note displays the first several words right on the record, highlighted in yellow. These notes flow from the order to the related shipment.
- Line Item Code notes – These notes flow from the line item code to the order, related shipment, and related invoice.
- Order notes – These are general notes about the order and appear only in the order record.

Line Item Code Note
Line Item Code Note Flowing to Order Record
Line Item Code Note Flowing to Shipment Record

Line Item Code Note Flowing to Invoice Record
