Timesheets are typically generated by an automated schedule that references team member settings. They can also be generated manually (e.g. if a team member works on a day they normally have off). These timesheets are used by each team member to record their time. Team members with the appropriate privileges can also record time for others. Submitted timesheets can be reviewed by approvers to reject, modify, or approve them.
Manually Creating a Timesheet
User Group privileges control whether team members can create timesheets for themselves and others.
- Navigate to Menu > Internal > Timesheets, then click New.
- At the dialog, specify the team member(s) and date(s).
Note: After a timesheet has been created, you cannot alter the record's date.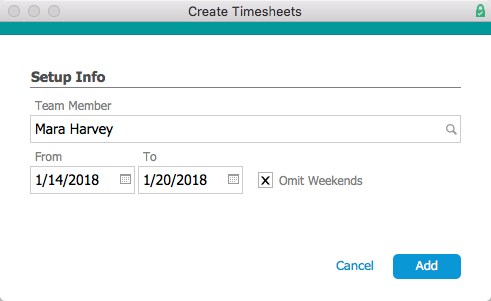
- Click Add.
The specified timesheets are generated as Pending records, with the Status indicator circle showing yellow, orange, or red, based on whether the timesheet is due in the future, due today, or past due.

Filling Out Timesheets
The Timesheets module initially displays the timesheets you're responsible for: your own Pending timesheets and any Submitted timesheets from team members you are the Timesheet Approver for. Certain supervisors can view additional timesheets:
- Timesheet Approvers — Can search for timesheets of users they are assigned to review. The assignment to be an approver is set at the user's Team Member record.
- Timesheet Management — Can search for every team member's timesheets, create timesheets for any team member, and approve any timesheet. The Timesheet Management access privilege is set at the User Group module.
Fill Out and Submit a Timesheet
- Navigate to Menu > Internal > Timesheets and locate the timesheet you want to work with.
- At the detail view, click Edit.
- Enter the details:
- Job — Required for recording a cost. When you first select a job, you must either type in the job number or use the magnifying glass to search for it. Once selected, it is added to a drop-down list of all jobs you have referenced in the previous two weeks.
- Task — If needed, select an activity related to the selected job.
- Line Item Code (LIC) — Auto-populated based on this hierarchy:
- Task — If you have specified a task, the LIC assigned to the Task Budget is added.
- Team Member — If the user's Team Member record has a default LIC specified, it is added.
- Manual — You can specify an LIC by clicking the LIC field or Search icon (
 ), otherwise the field is left blank.
- Notes — Summarize the work completed.
- Hours — Enter the time used to accomplish the work. This number will be multiplied by the team member's Bill Rate.
- Overtime — Mark this flag to identify hours exceeding scheduled time.
- Click Save to record the details, then click Submit.
To keep the timesheet in Pending status, click Not Yet. The timesheet can be submitted later from the Actions menu.
Reviewing and Approving Timesheets
Approvers can easily review records in the Timesheets module using the footer links (e.g. click Find Timesheets and select a timeframe). The Timesheets module provides additional features:
- Reminders — You can send a message to users who have not submitted their time: Actions > Email Team Members in List.
- Salaried Employees — These team members may have time entries that vary from typical hour/week expectations. You can enter manual adjustments to equal an eight-hour day (or you can use additional GL transactions), depending on your company policies.
- Errors and Corrections — You can send timesheets that have errors back to the team member for an update: Actions > Revert Timesheet to Pending. Be sure to communicate with the team member so they know a correction is expected.
Note: An error may not be recognized until after the timesheet has been approved (i.e. after accounting transactions have been created). Click Actions > Void Timesheet to remove the timesheet from activity and to reverse the GL transactions. Then click Actions > Duplicate Timesheet to replicate the timesheet and make the corrections.
Note: All updates to Timesheet records are tracked in the record Log ( ).
).
In addition, supervisors can review progress on job costs from Menu > Order Management > Job Costs > Quick Search to locate the desired records.
Approving Timesheets
From the timesheet's detail view, click Actions > Approve Timesheet, then click Approve at the confirmation dialog. This generates the related GL entries for the time expense (unless the team member is flagged as a freelancer). This allows you to produce very accurate income statements for each order.
Reviewing GL Transactions
You can easily jump to the actual GL entries for an Approved timesheet: from the timesheet, click Admin Actions ( ) > Go to Related General Ledger Entries.
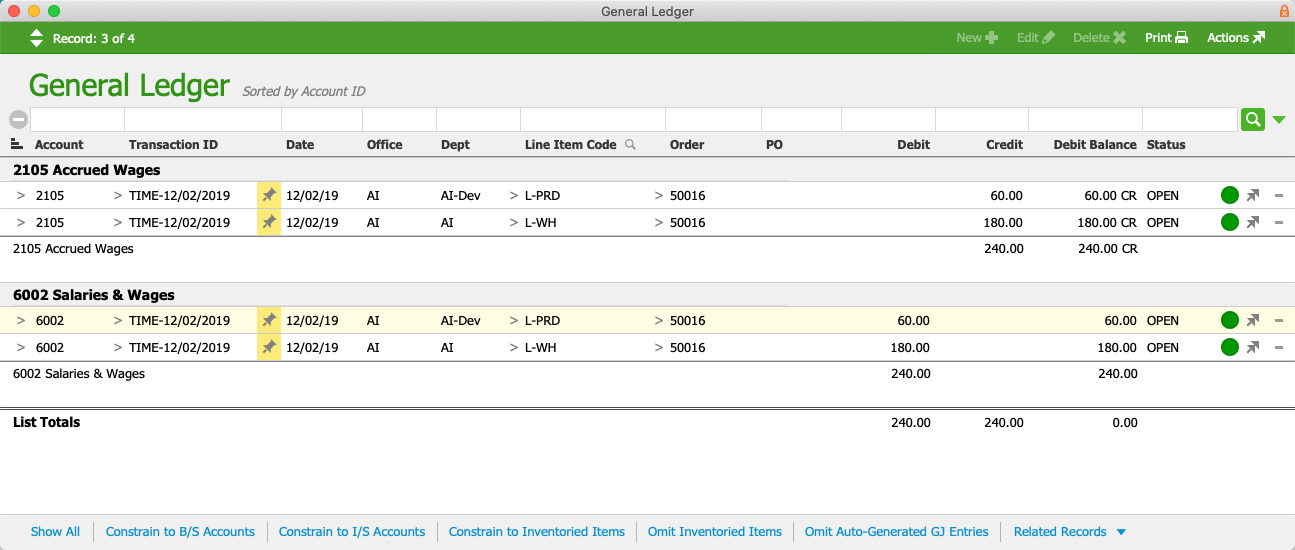
The GL transactions show the expenses and the off-setting accrued wages. You can sub-summarize by account to compare these values. Later, the accrued wages will be debited by the payroll account and any purchases for freelancer time. The actual personnel cost is also linked to the Job and Order records, which helps you discern true profitability per order.
The Note field ( ) highlights which team member is associated with each GL transaction. For salaried team members, the balance in Accrued Wages can serve as an estimated profit/loss. (Note: For this estimate, you can simplify reconciliation by requiring eight hours/day on timesheets, using PTO to supply the balance.)
Reporting and Exporting
The Timesheets module provides reports specific to timesheets: click Print > Open Report Selector. After generating a report, you can export the results by clicking Save as Excel or Save as PDF:
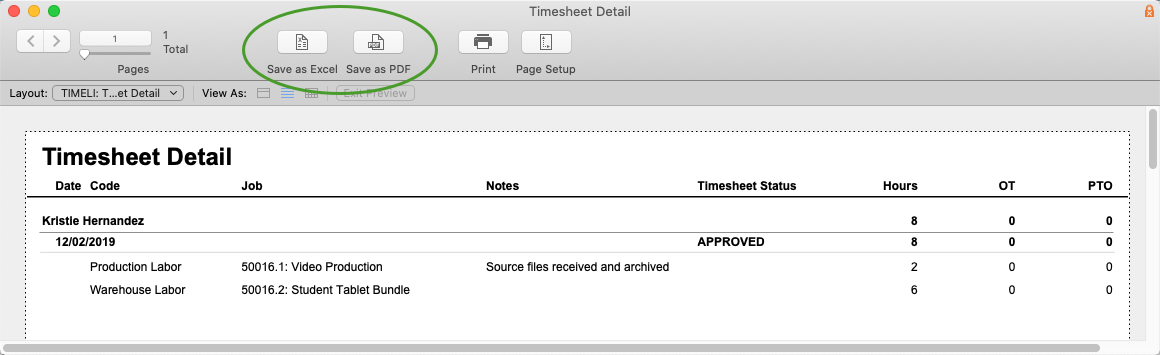
The Orders module also provides reports with useful summaries of time data. Some of these reports include sensitive data (e.g. individual labor rates), so they are restricted to user groups with the needed access privileges.